Working with Files
¶File Browser 
The file browser and File menu enable you to work with files and directories on your system. This includes opening, creating, deleting, renaming, downloading and copying files and directories.
BioStudio is providing many ways to work with files and folders. Please review the details below.

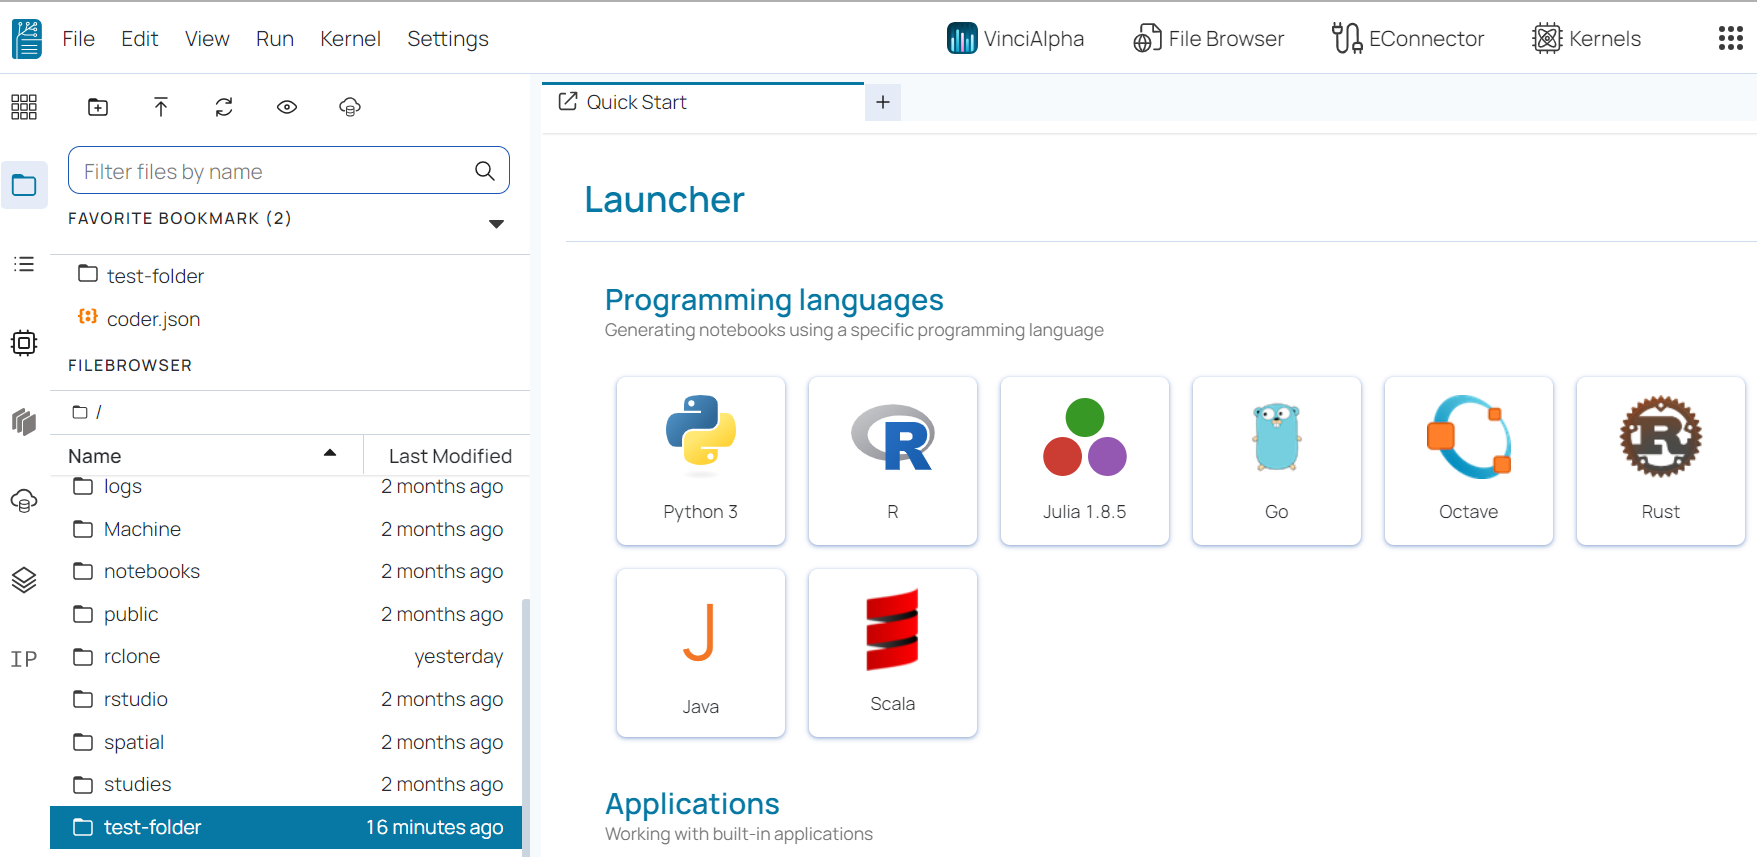
The file browser is in the left sidebar Files tab
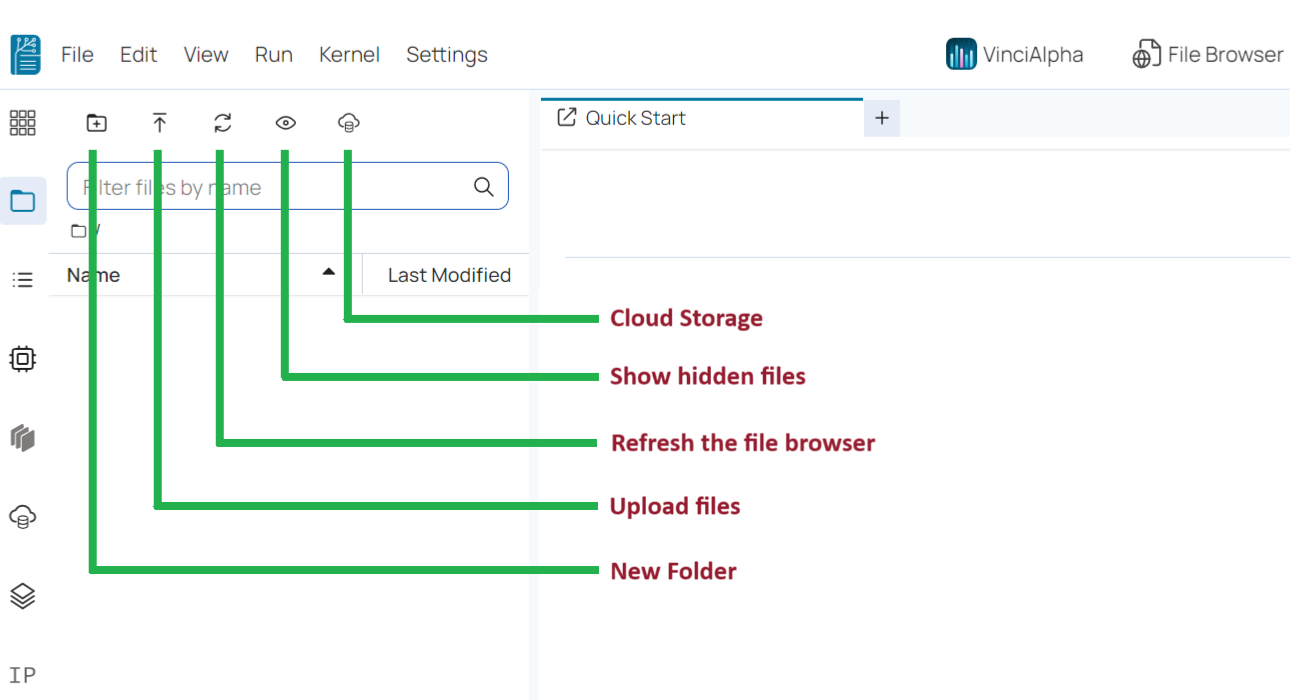
💠 Path Area would be changed based on current folder you are in.

Folder functions 
We can create a new folder by following these steps:
💠 New folder
🔹 Click on New folder Icon.
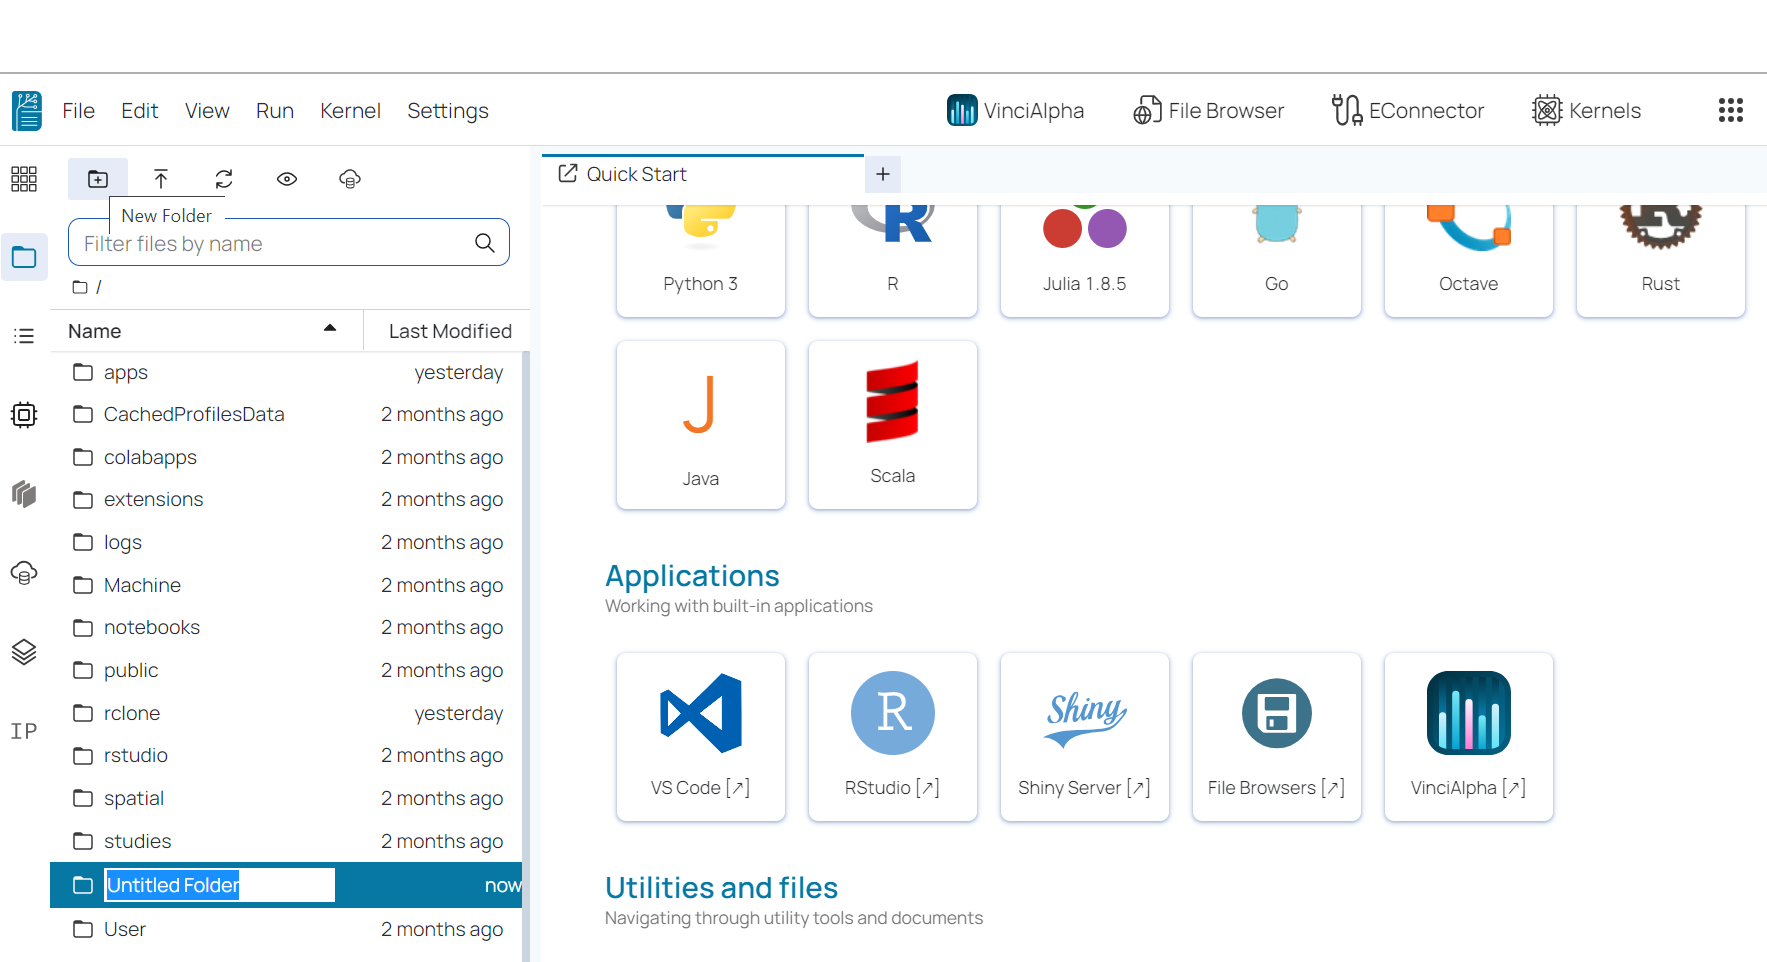
🔹 Provide name of folder.
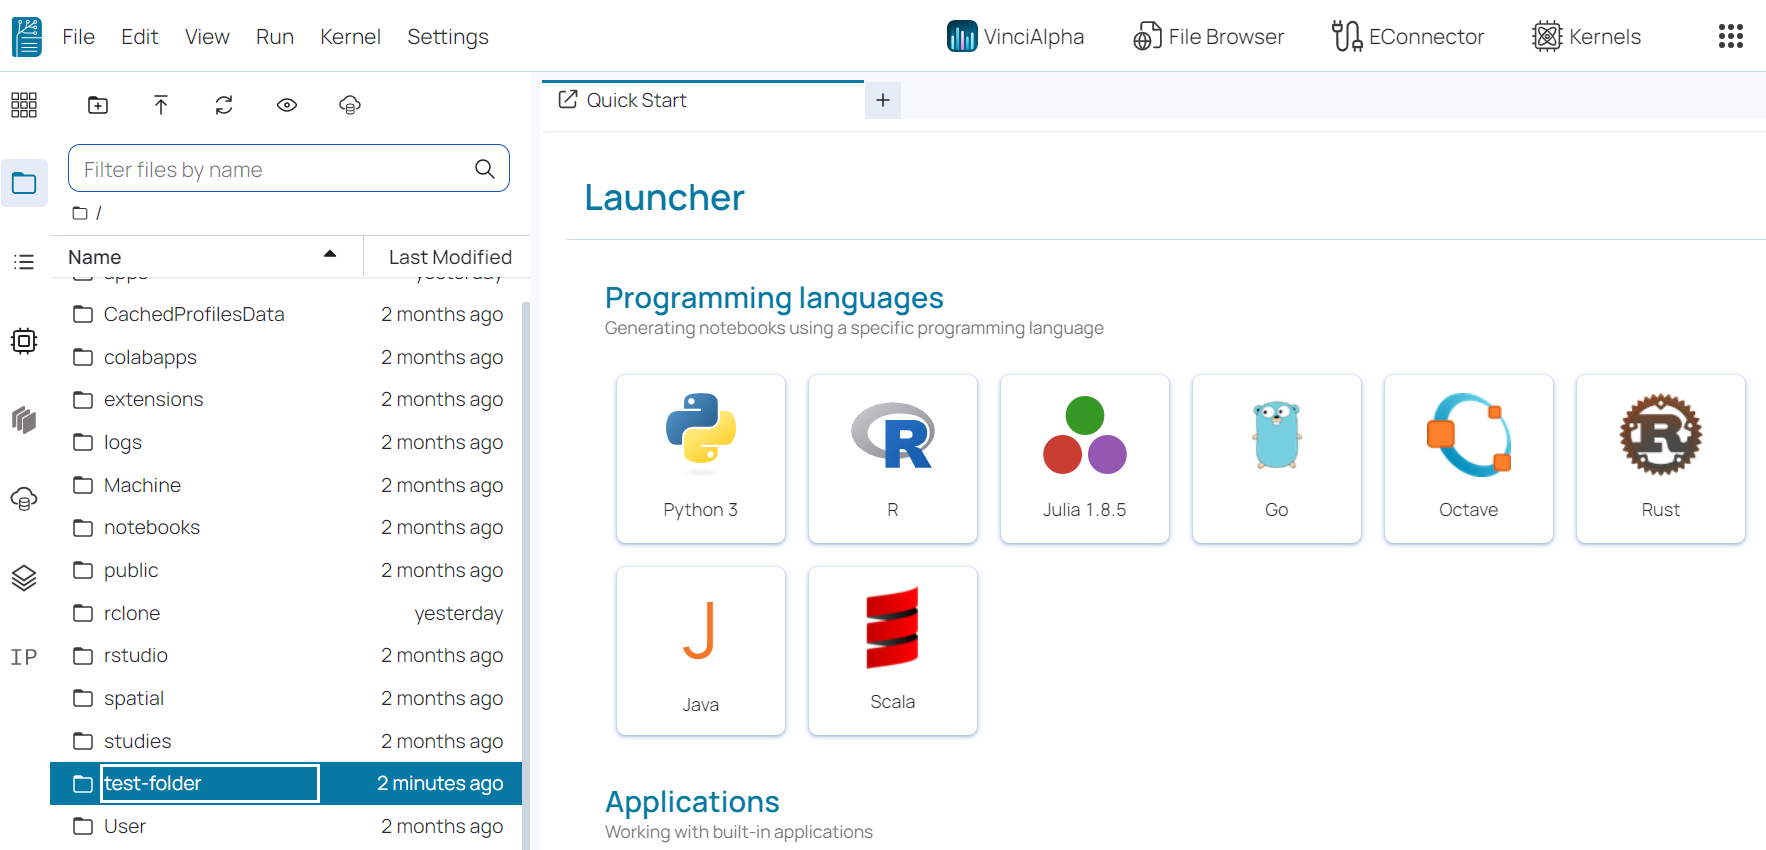
💠 Create Switch in/out Folder
🔹 To open any file, double-click on its name in the File Browser.
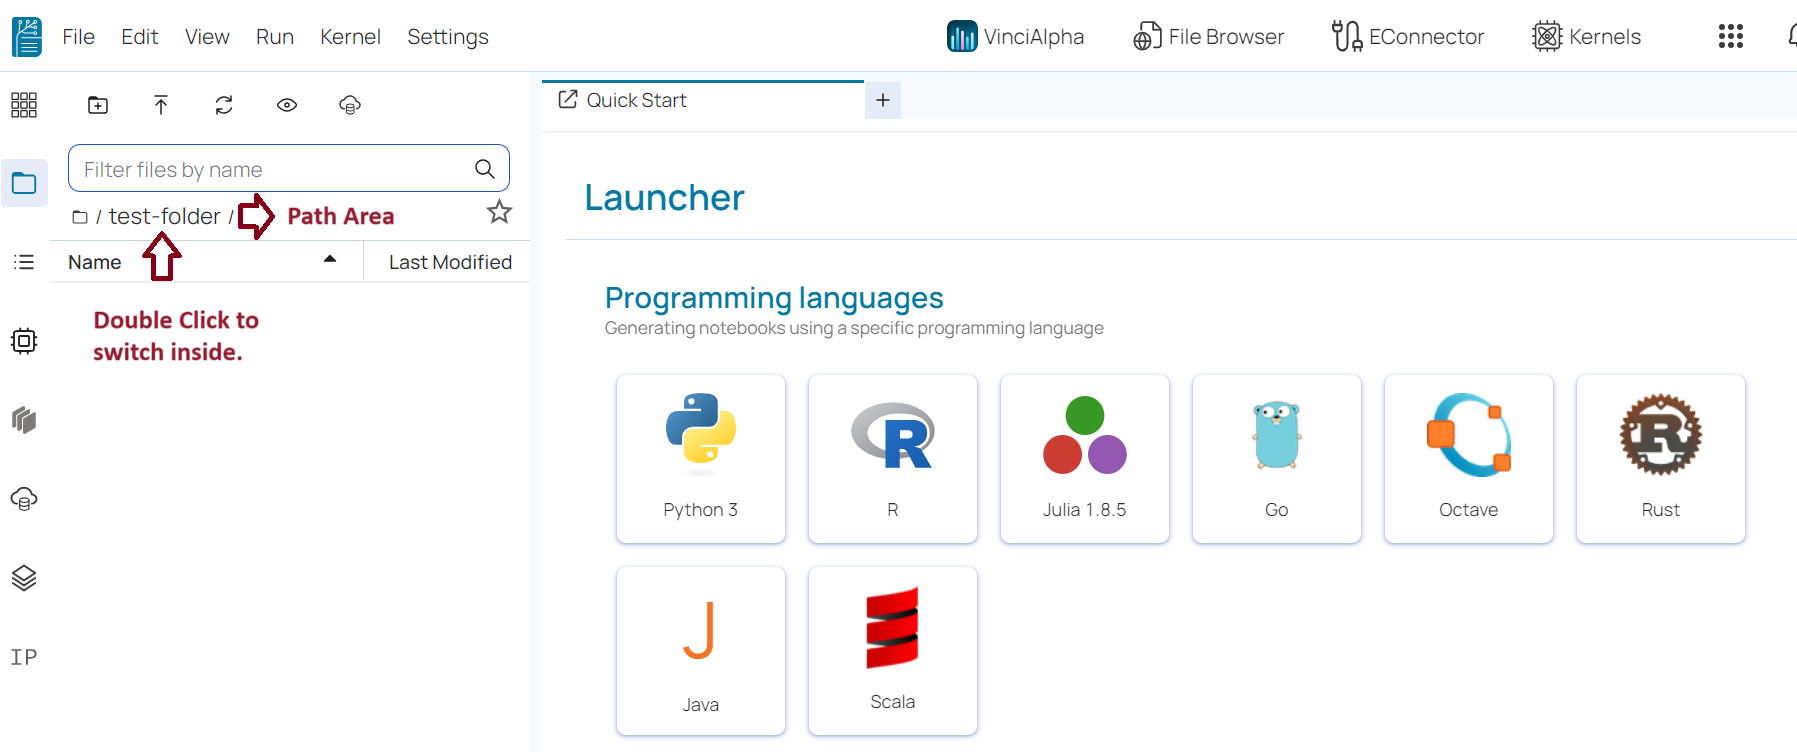
🔹 You can revert back and come out / in from folder. Just click on folder name on path.
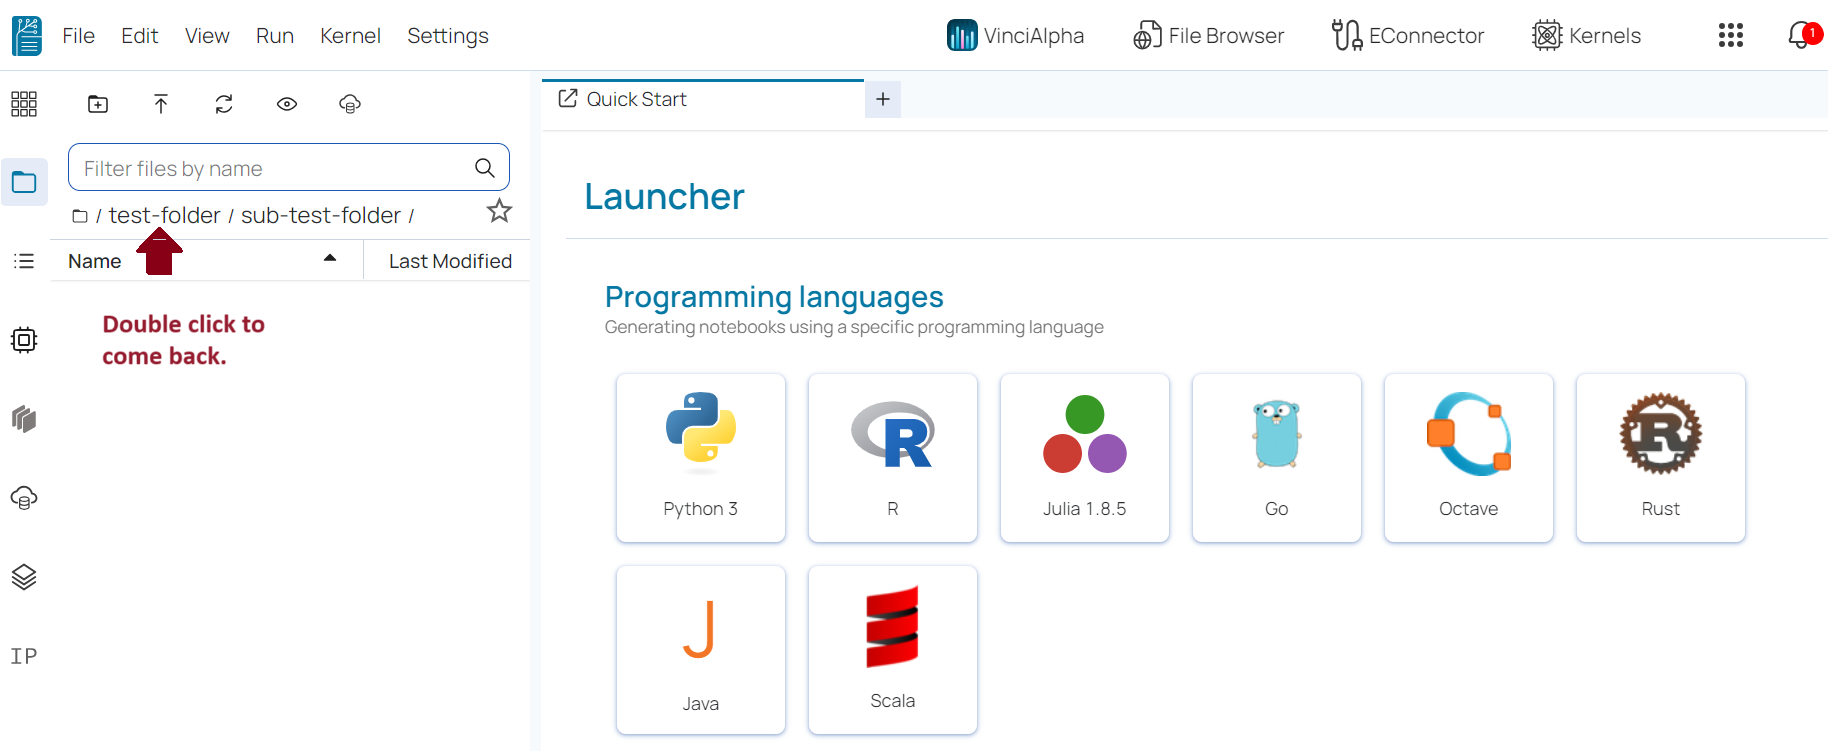
– OR –
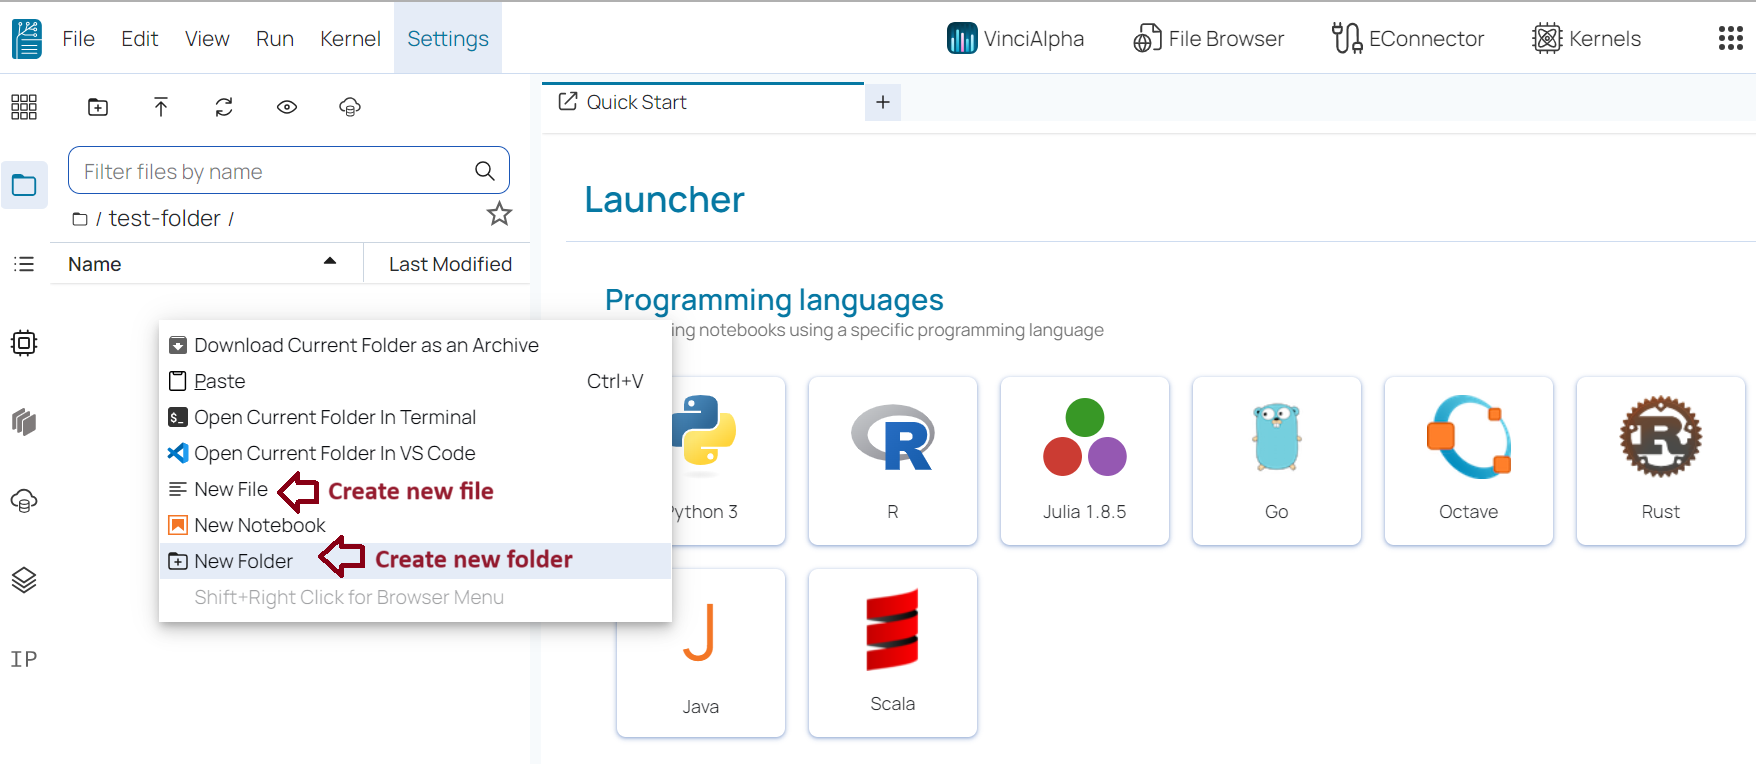
Create New Folder from right click on blank area.
Right click on blank area also providing option to create new folder or file.
💠 Right click on folder options.
Right click on folder name also providing many valuable option.
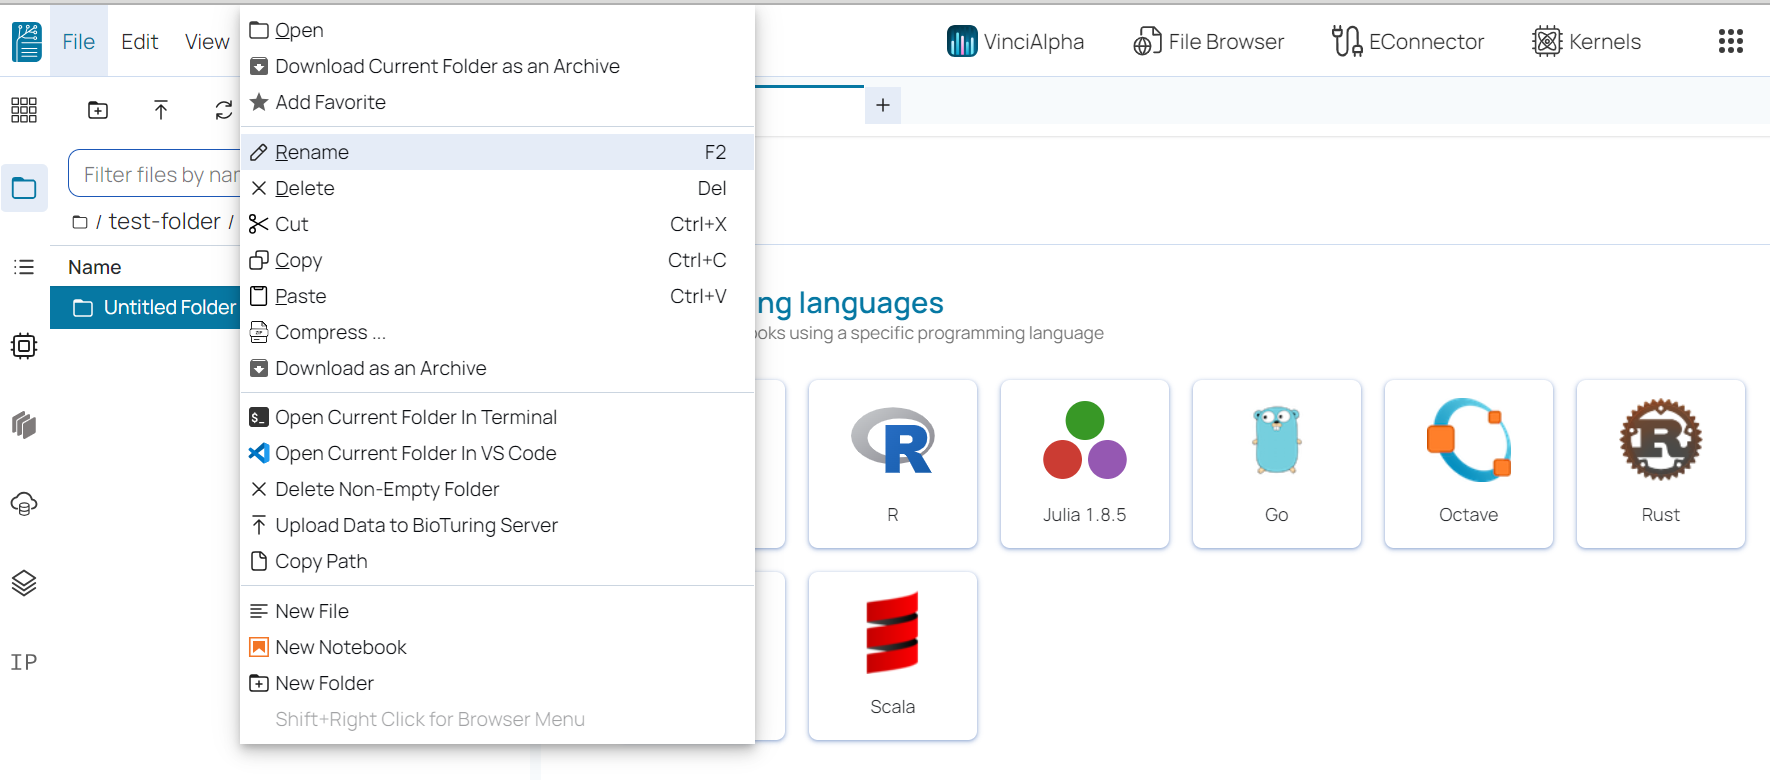
🔹 Open : It is used to open folder / file.
🔹 Download Current Folder as an Archive : It is used to compress current folder and download to your local.
🔹 Add favorite : It will create a favorite bar and add your folder and files on it to directly works.
🔹 remove favorite : Add favorite would be converted to remove favorite once added.
🔹 Rename : Change / give new name to file / folder.
🔹 Delete : Delete selected files / folders.
🔹 Cut : Cut selected files / folders.
🔹 Copy : Copy selected files / folders.
🔹 Paste : Place the selected files / folders that was cut / copy.
🔹 Compress : This is option used to compress selected folders in zip / tarz . 7z format.
🔹 Extract Here : Compressed folder right click will have an option to extract here.

🔹 Download as an Archive : It is used to download selected folder in local.
🔹 Open Current Folder in Terminal : It is used to open current folder in terminal.

🔹 Open Current Folder in VS Code : It is used to open folder in VS code.
🔹 Delete Non-Empty Folder : It is used to remove non empty folder.
🔹 Upload Data to BioTuring Server : It will upload folders / files BioTuring Server.
🔹 Copy Path : It is used to copy file / folder path.
🔹 New File : It is used to create new file.
🔹 New Notebook : It is used to create new Notebook.
🔹 New Folder : It is used to create new Folder.
File Menu 
💠 Many actions on files can also be carried out in the File menu:
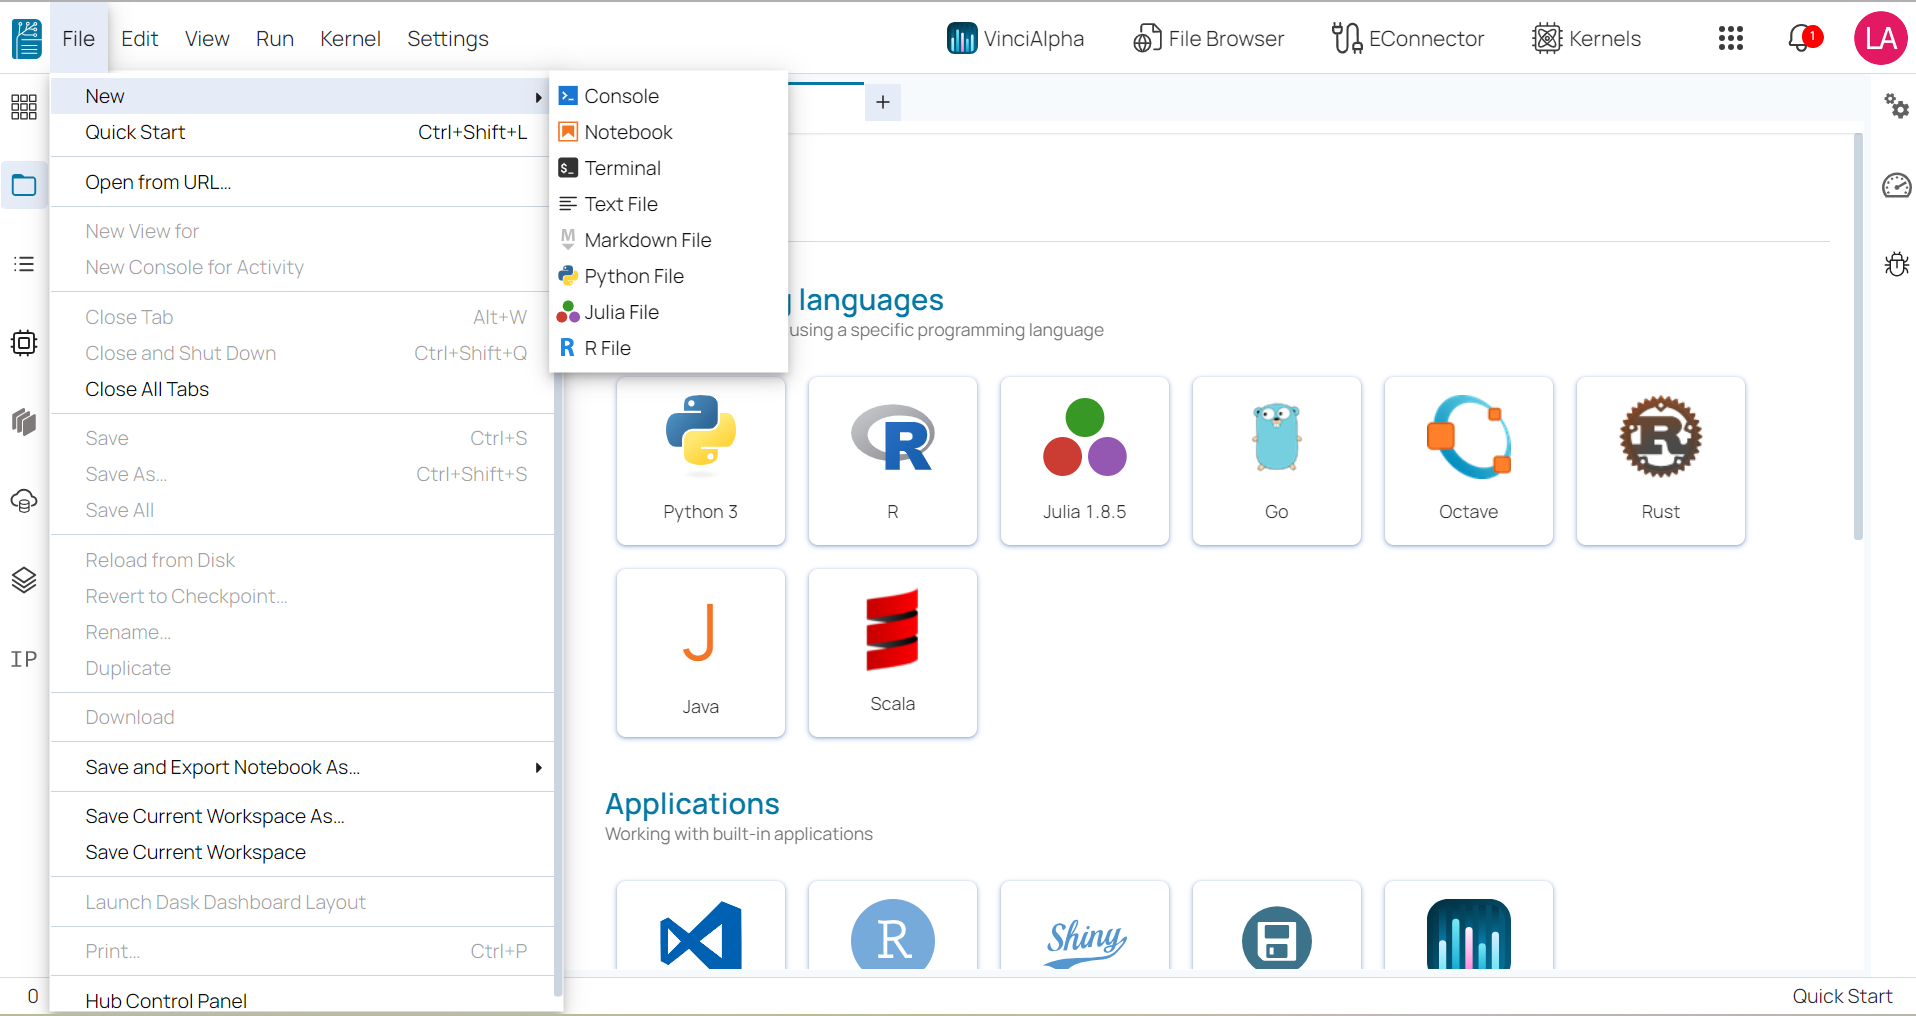
Upload file 
It is used to upload files to specific folder that you are in.
🔹 Click on Upload file Icon.
🔹 Select the file that you would like to upload.
🔹 Click on Open to upload file.
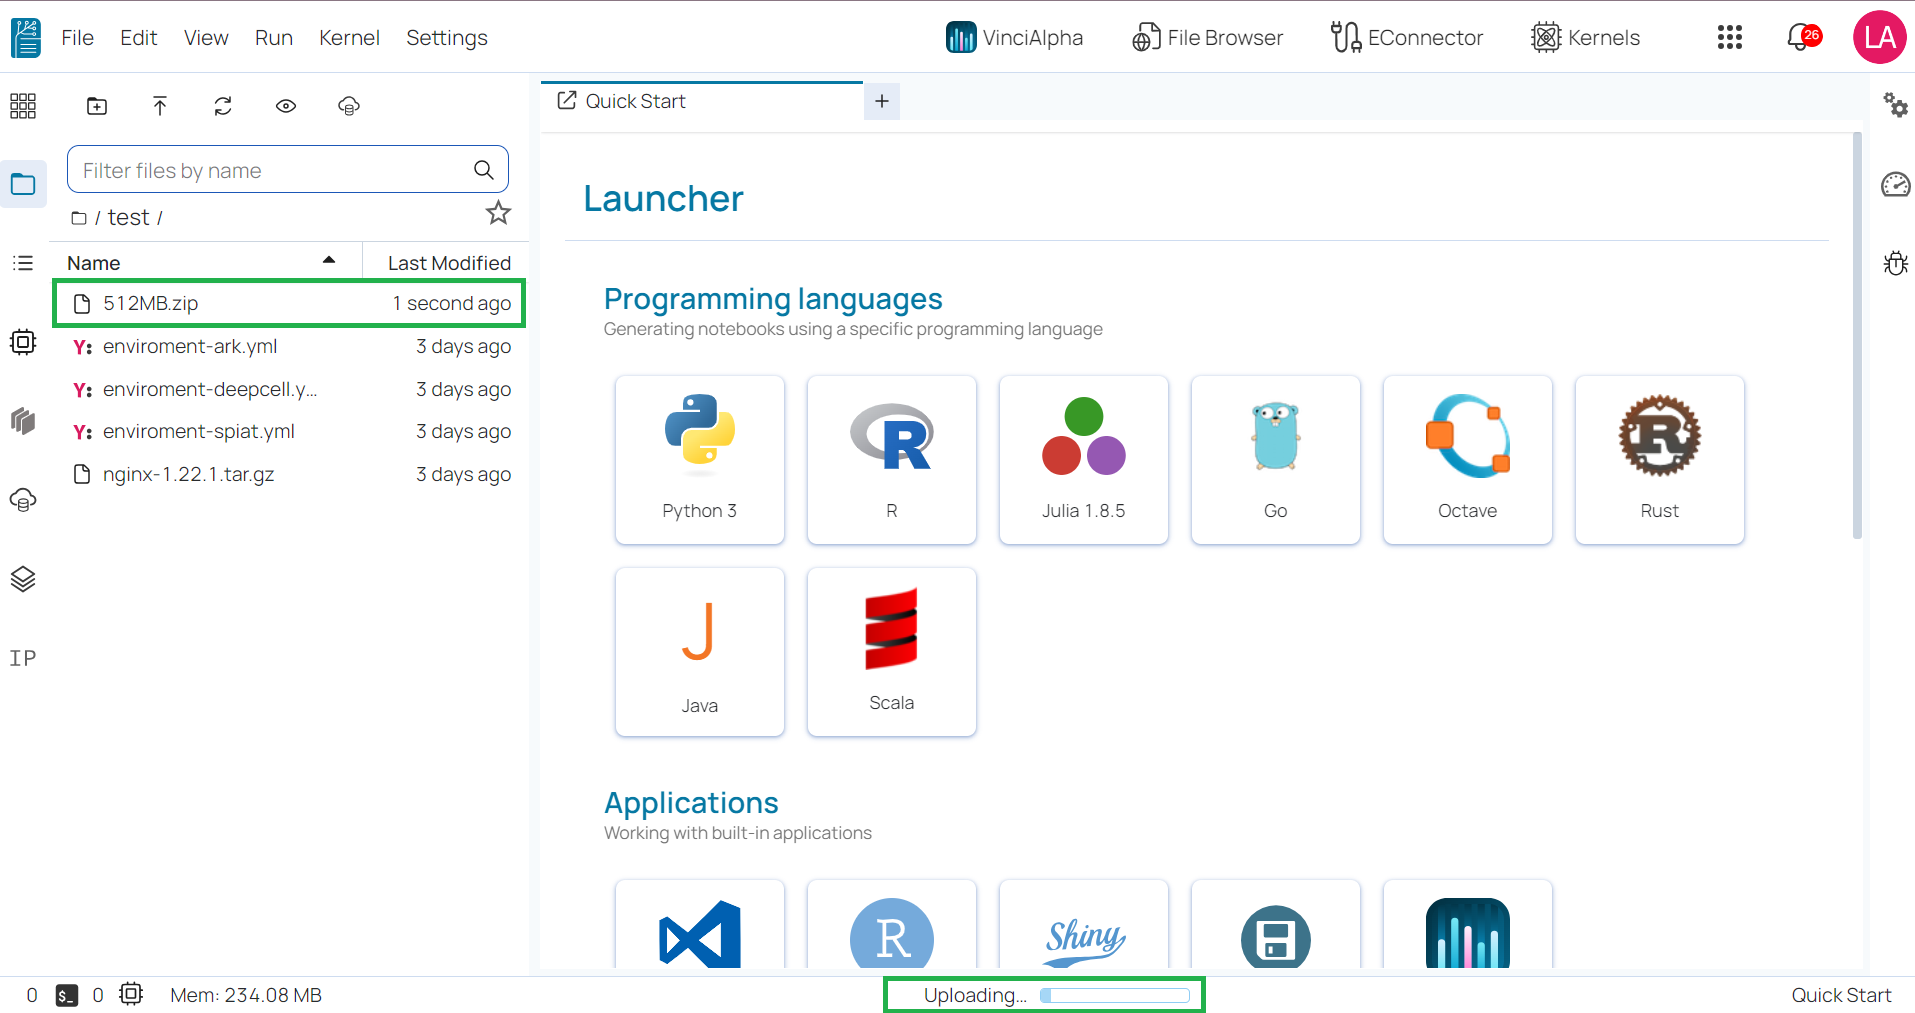
🔔 Note: When we will upload any files. It will show the upload status at the bottom. Please make sure that the upload is completed before opening any file.

– OR –
🔹 We can drag and drop file from your local to BioStudio.
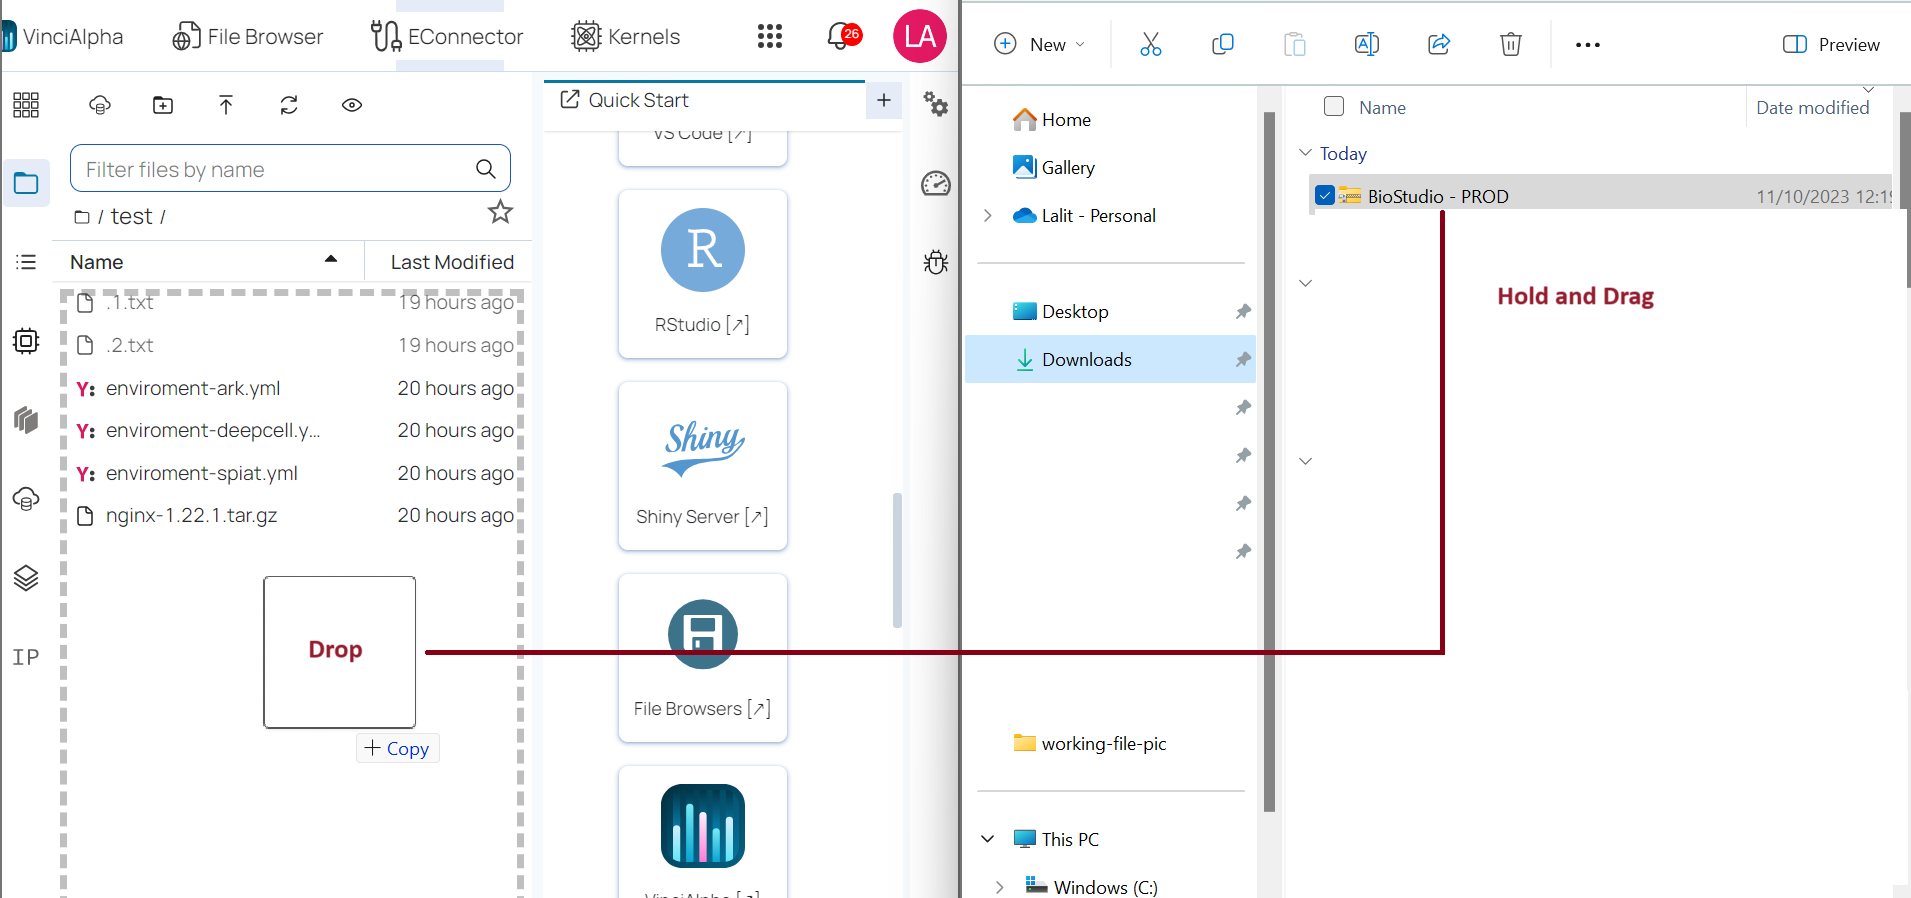
🔹 It will show large file size warning.
🔹 Click on Upload button.
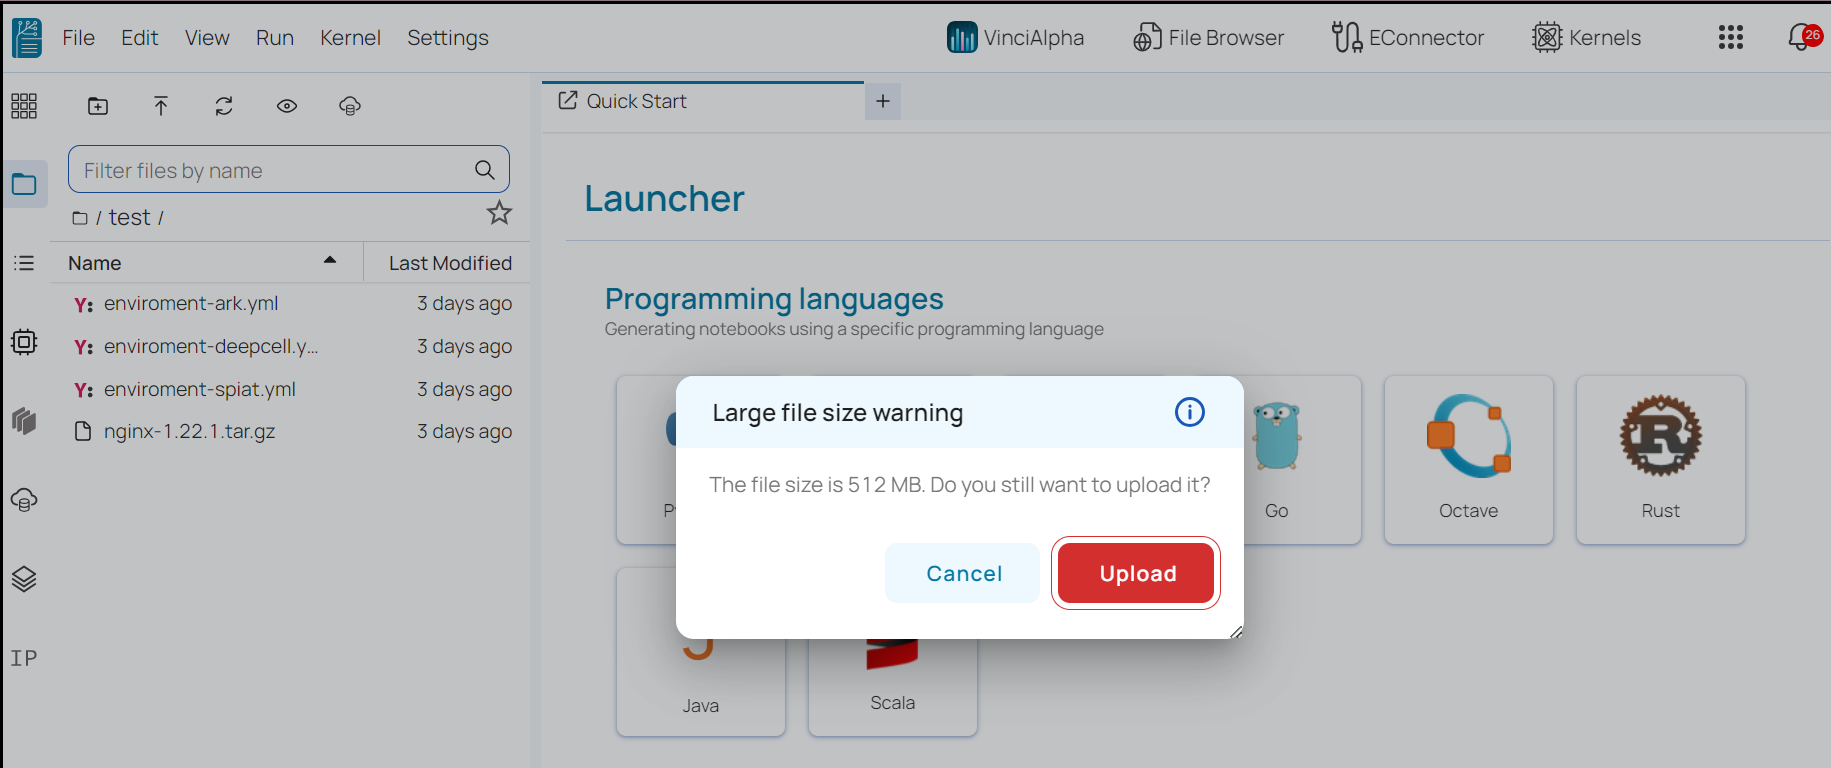
🔹 Click on Upload button.
The file will appear in the list, and we can view the upload status at the bottom.
We must wait until the upload is completed. In that case, we would like to stop this upload. We just need to refresh the browser. It will stop file uploads, and later we can delete this partially uploaded file.
Refresh the File Browser 
It is used to refresh current folder structure.

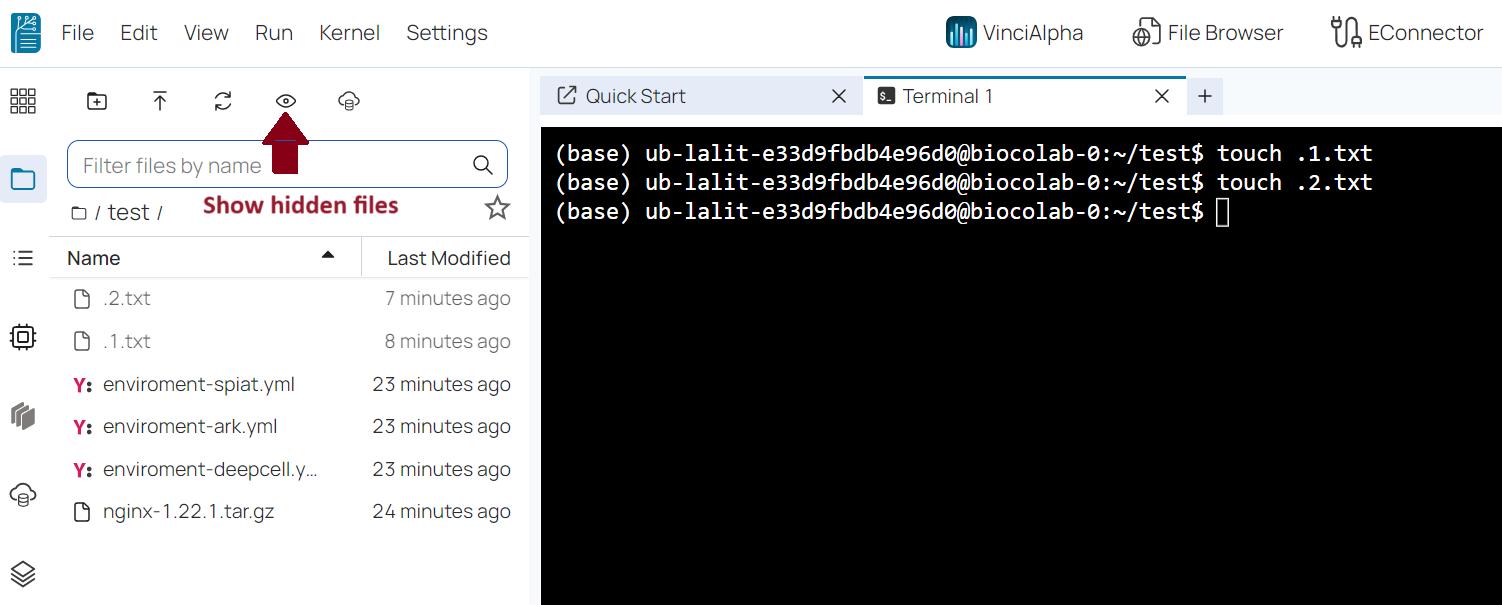
Show hidden files 
It used to show hidden files.
Cloud Storage 
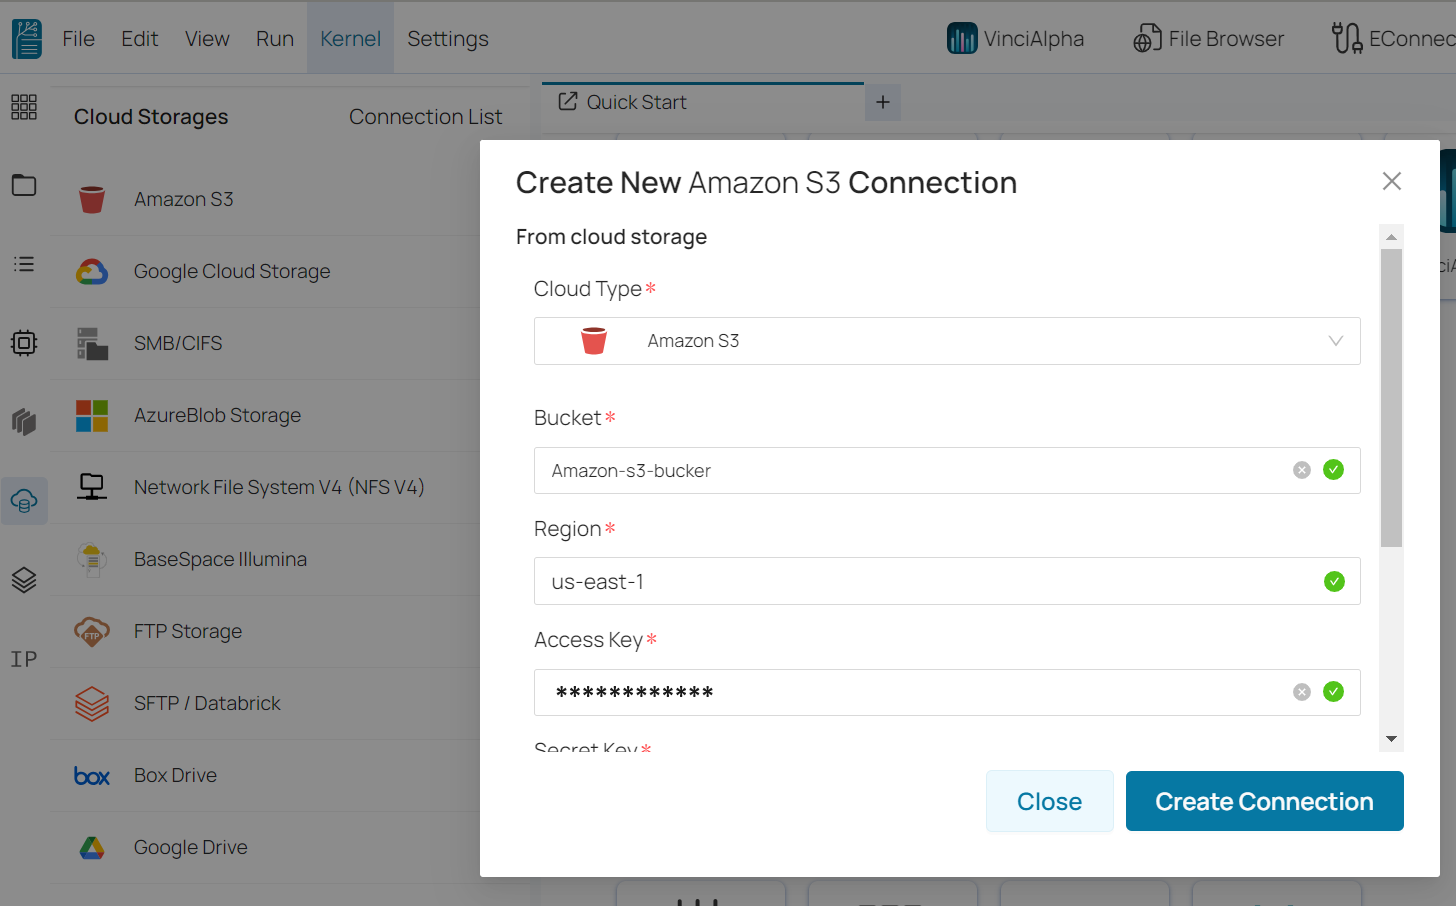
BioStudio providing a great features there you can create a connection to your cloud storage.
1. Amazon S3
2. Google Cloud Storage
3. SMB/CIFS
4. AzureBlob Storage
5. Network File System V4 (NFS V4)
6. BaseSpace Illumina
7. FTP Storage
8. SFTP / Databrick
9. Box Drive
10. Google Drive

Amazon S3 storage connection 
It is used to make a connection with Amazon S3
🔹 Select Amazon S3 from connection list.
🔹 Provide all the mandatory information and fill to specified field.
🔹 Click on Create Connection.
🔹 Click on Refresh Connection list to view connection.

🔹 Either double click on connection name or click on three dots … to have more options.
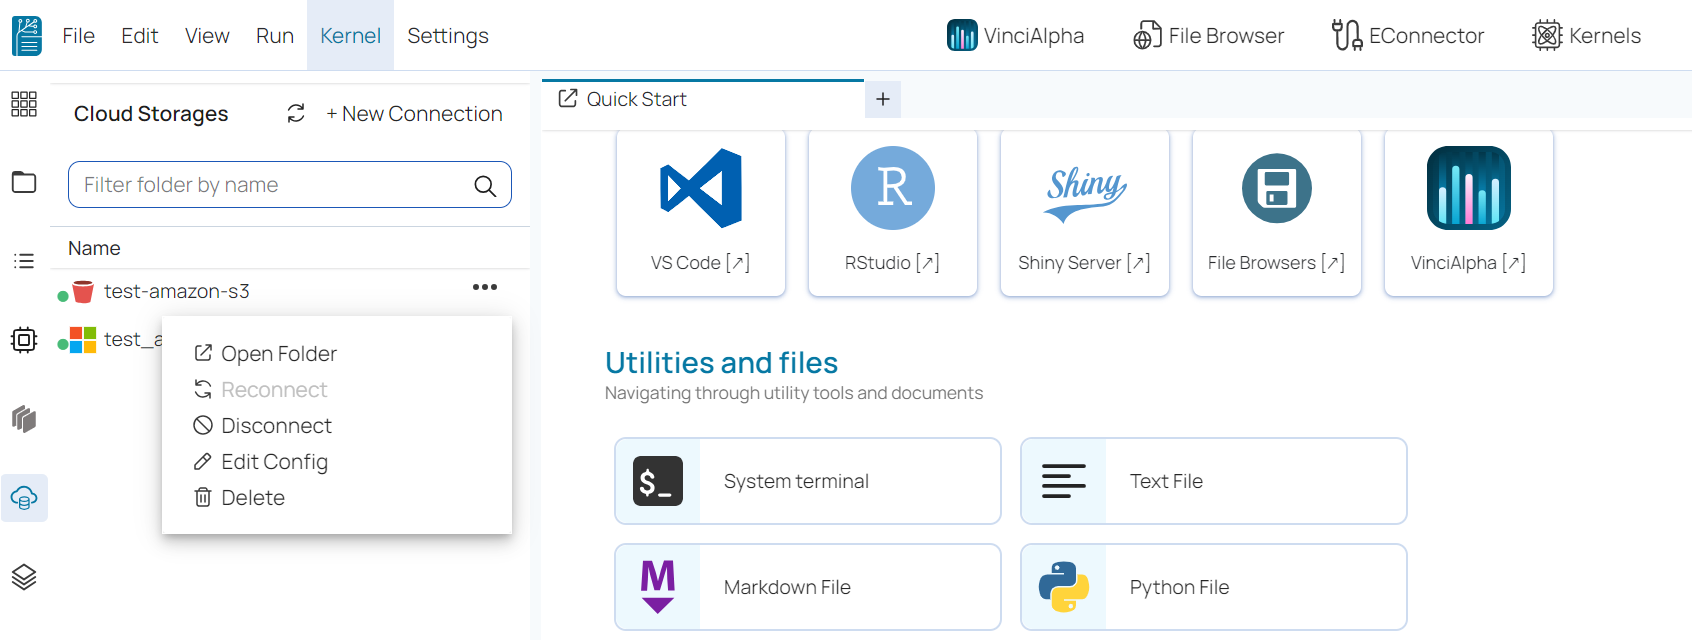
🔹 Open Folder : It is used to open folder.
🔹 Reconnect : It is used to reconnect to connection. It will be enabled once disconnected.
🔹 Disconnect : It is used to disconnect current connection.
🔹 Edit Config : It is used to edit existing connection string.
🔹 Delete : It is used to delete specified connection.
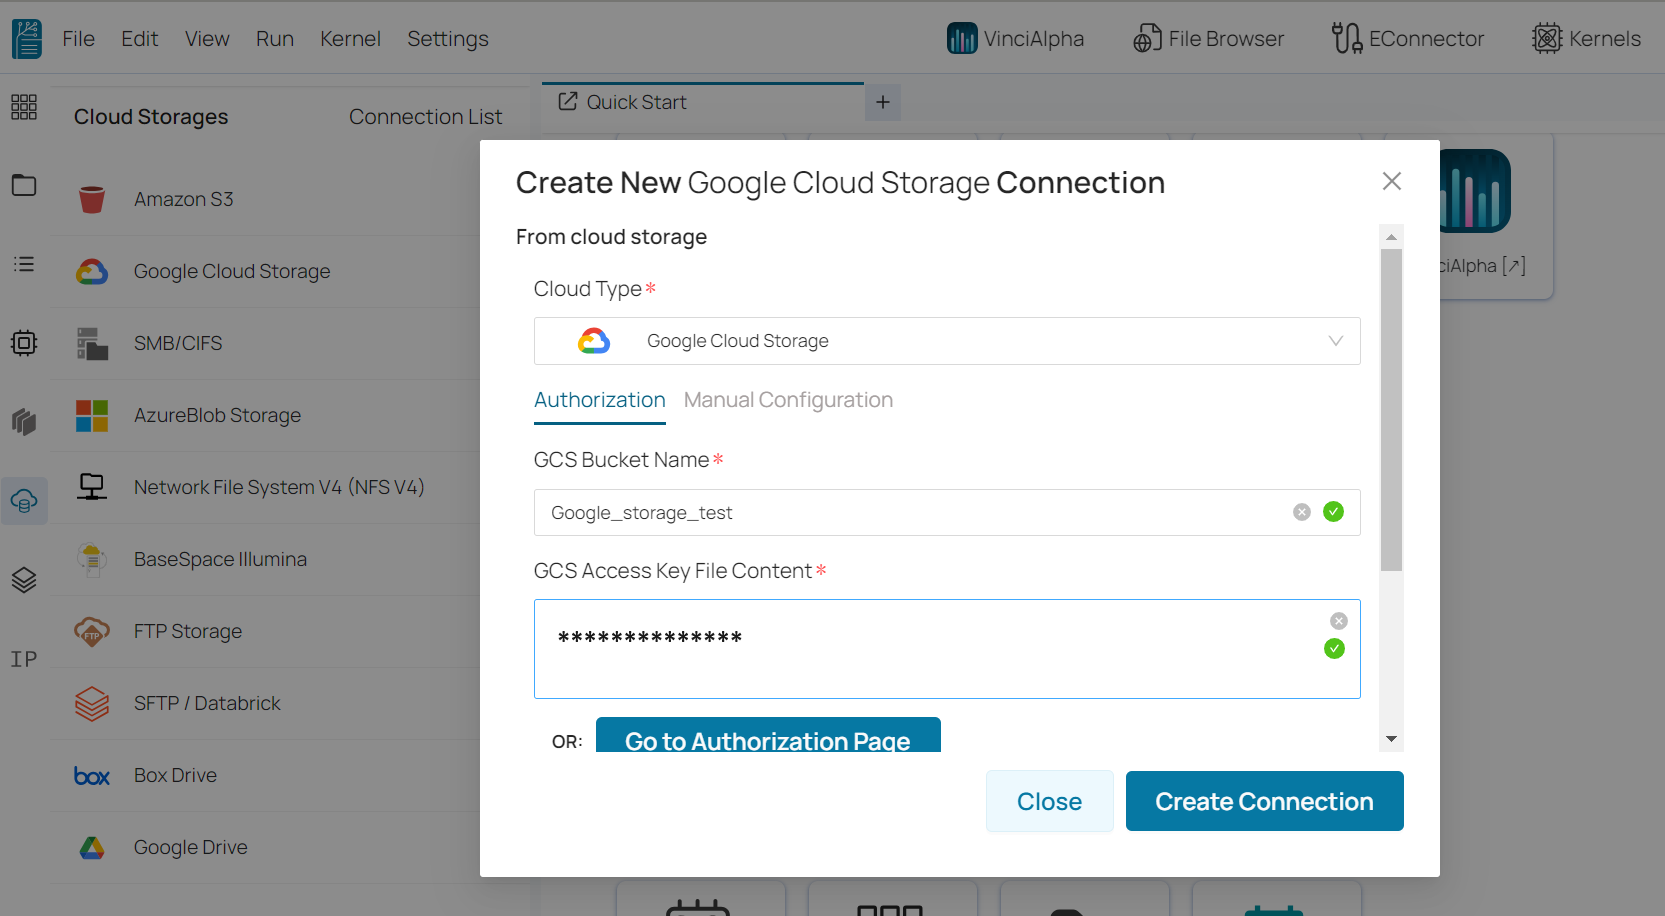
Google Cloud Storage Connection 
It is used to make a connection with Google Cloud Storage.
🔹 Select Google Cloud Storage from connection list.
🔹 Provide all the mandatory information and fill to specified field.
🔹 Do the Authorization or use Manual Configuration.
🔹 Click on Create Connection.
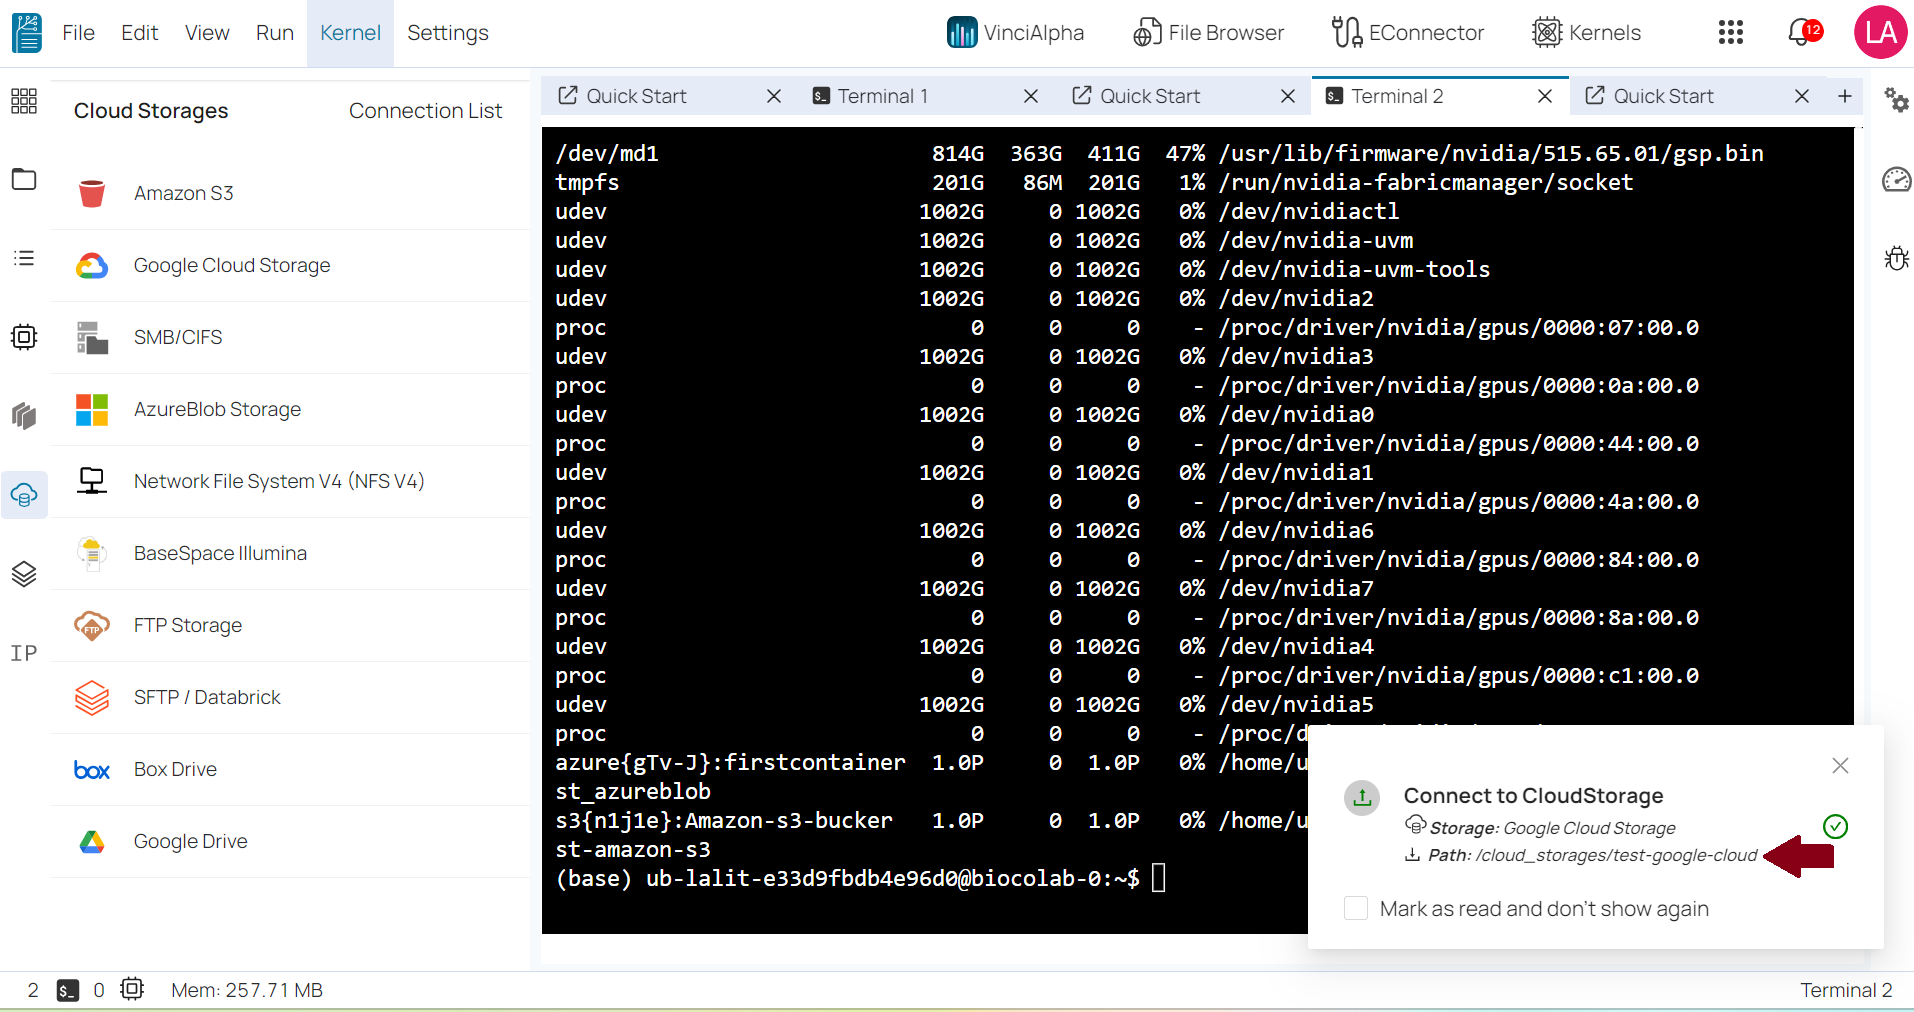
🔹 It will popup a success message.
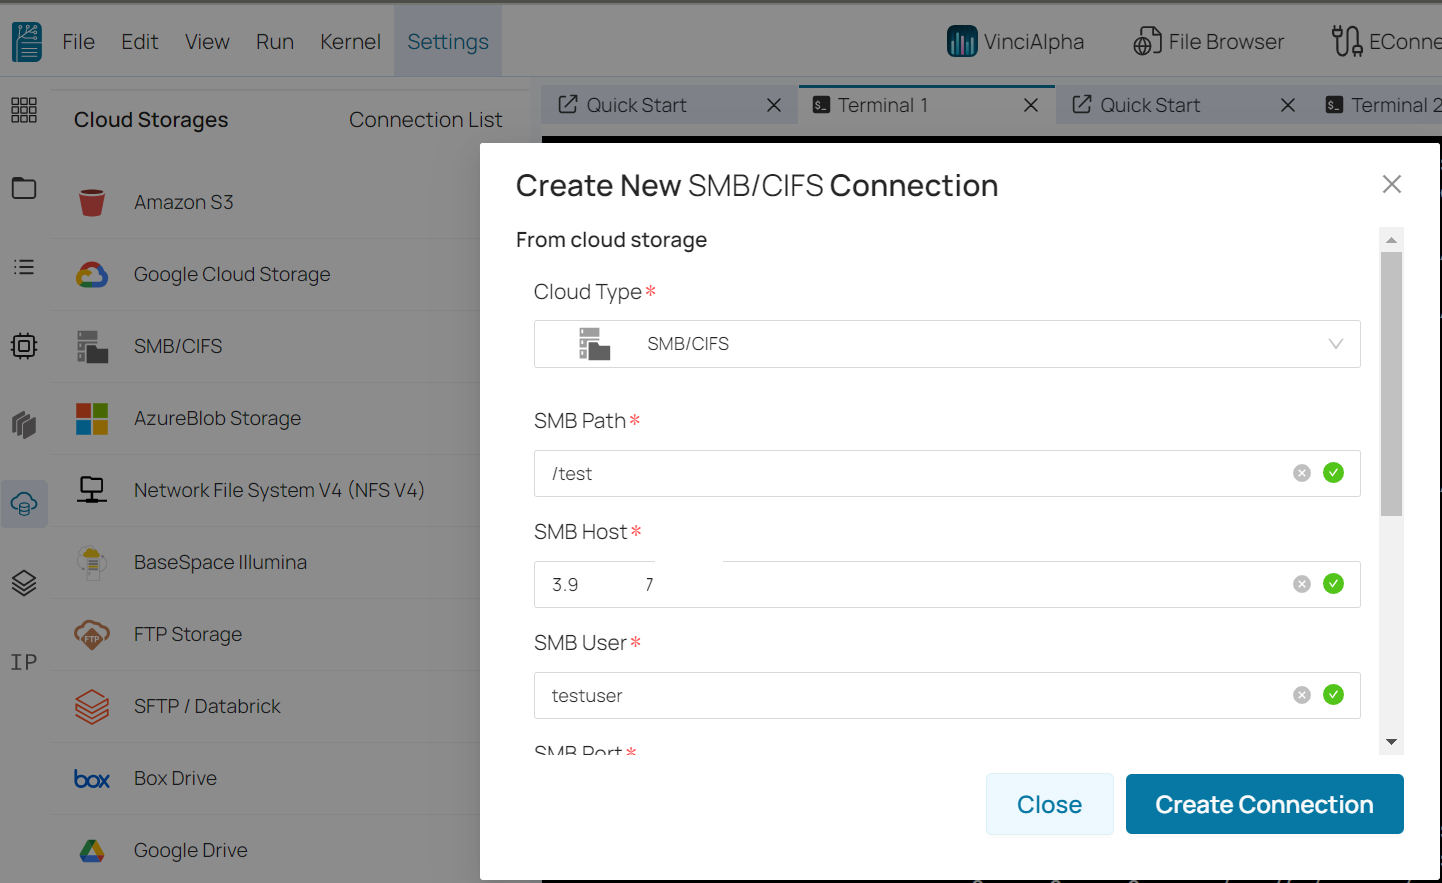
SMB/CIFS 
It is used to make a connection with SMB/CIFS protocol.
🔹 Select SMB/CIFS from connection list.
🔹 Provide all the mandatory information and fill to specified field.
🔹 Click on Create Connection.
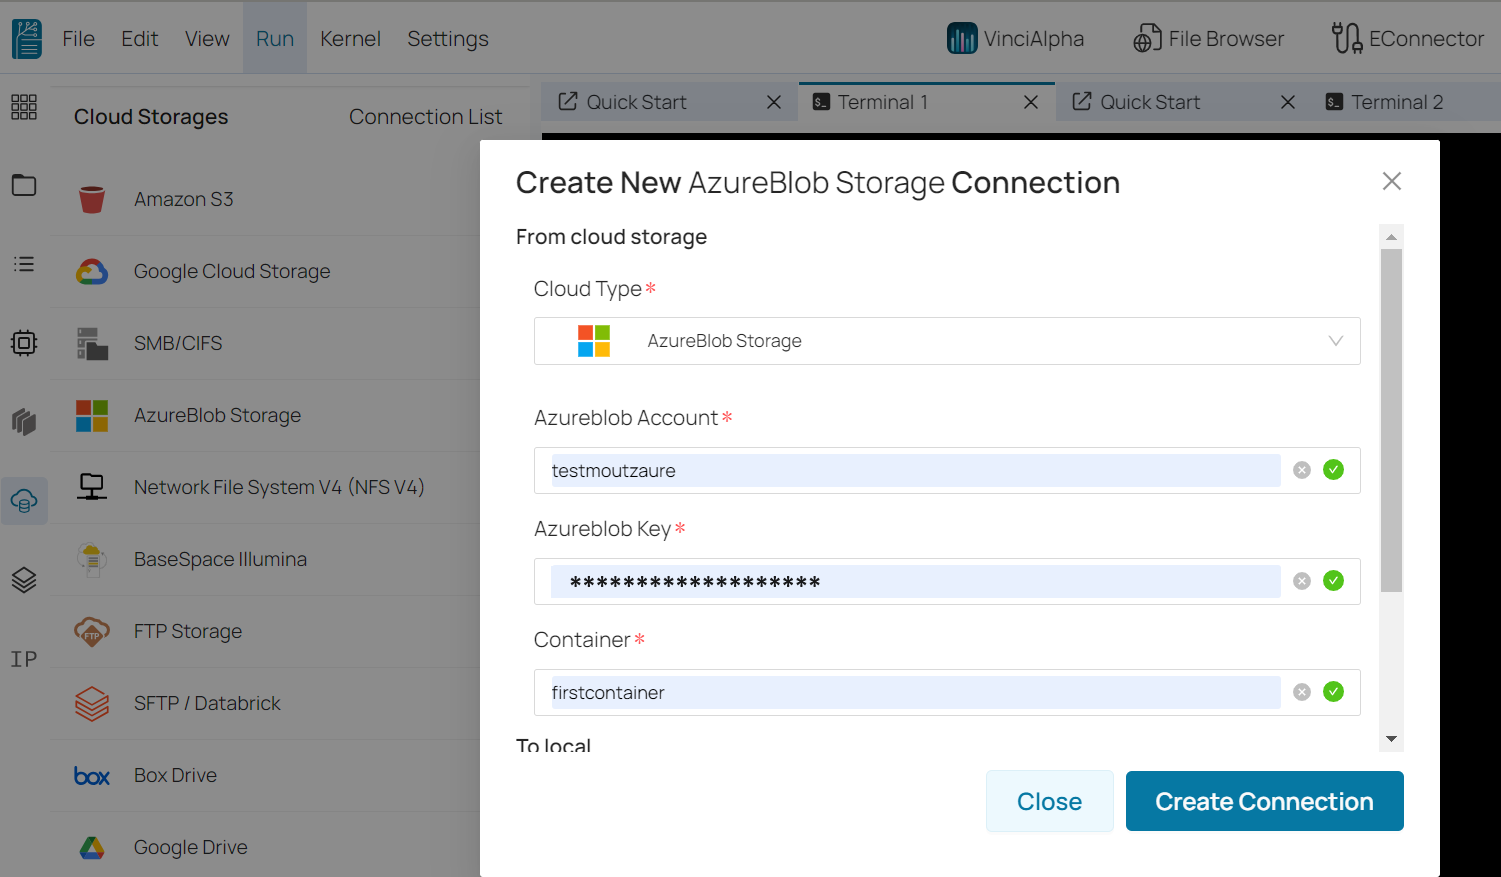
AzureBlob Storage 
It is used to make a connection with AzureBlob.
🔹 Select AzureBlob from connection list.
🔹 Provide all the mandatory information and fill to specified field.
🔹 Click on Create Connection.
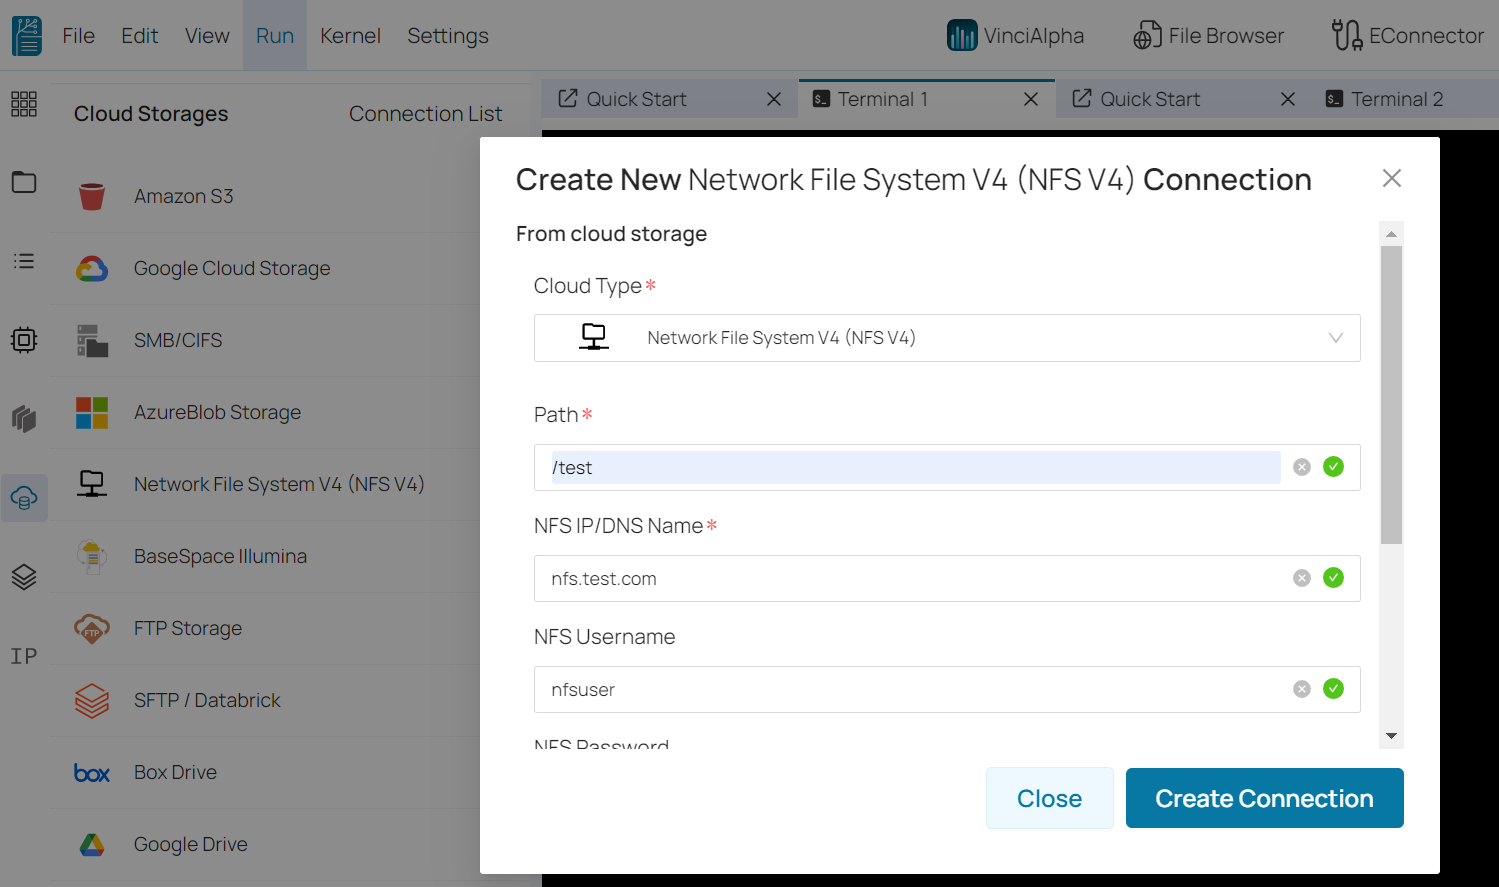
Network File System V4 (NFS V4) 
🔹 Select NFS from connection list.
🔹 Provide all the mandatory information and fill to specified field.
🔹 Click on Create Connection.
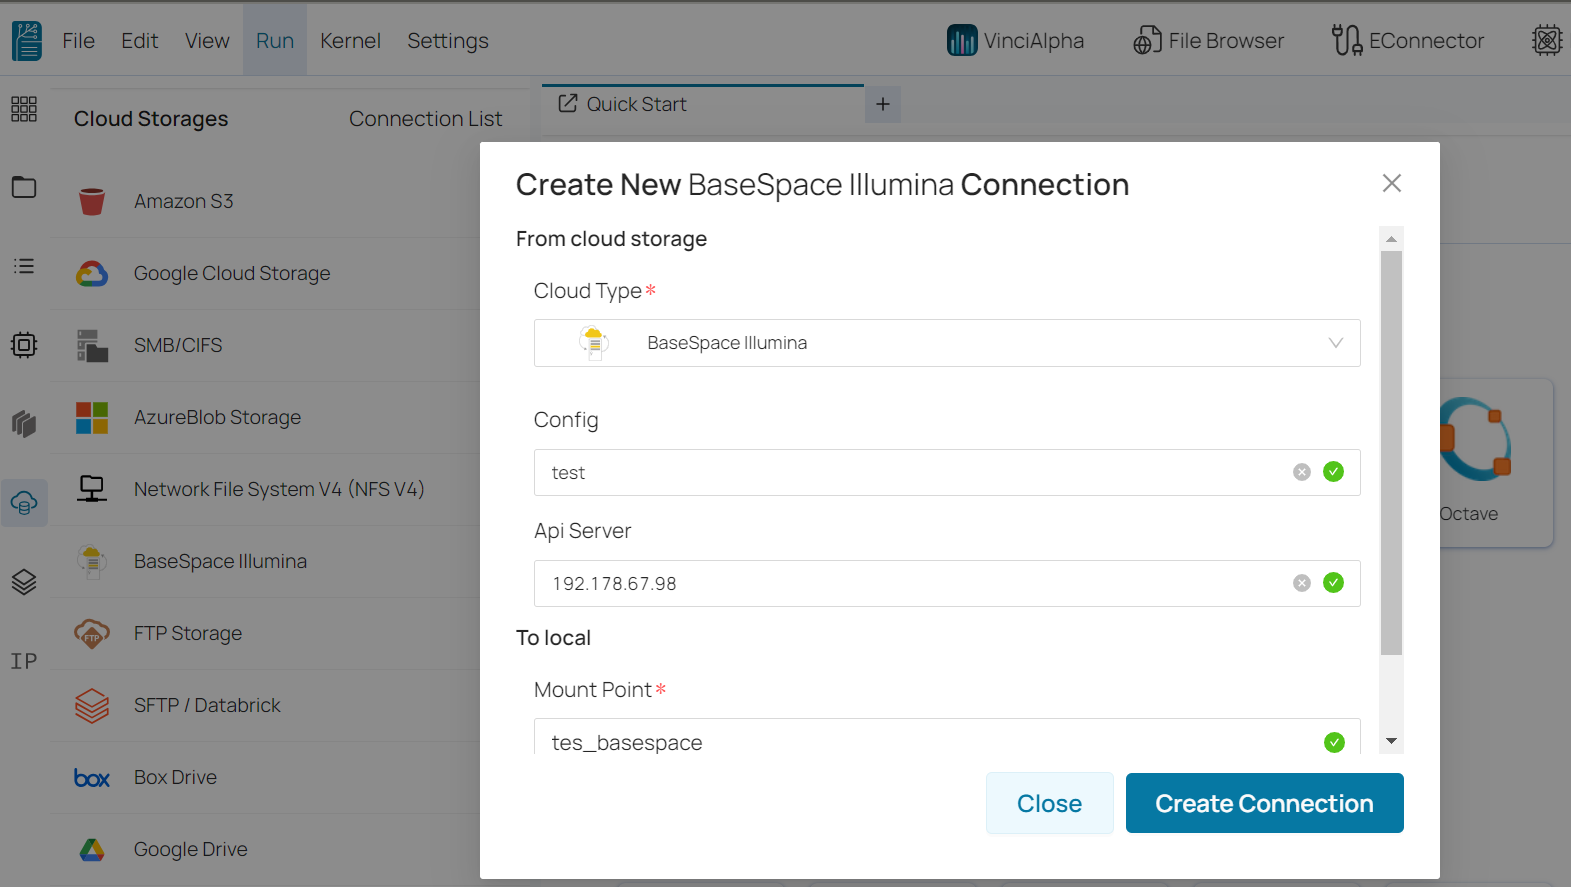
BaseSpace Illumina 
🔹 Select BaseSpace Illumina from connection list.
🔹 Provide all the mandatory information and fill to specified field.
🔹 Click on Create Connection.
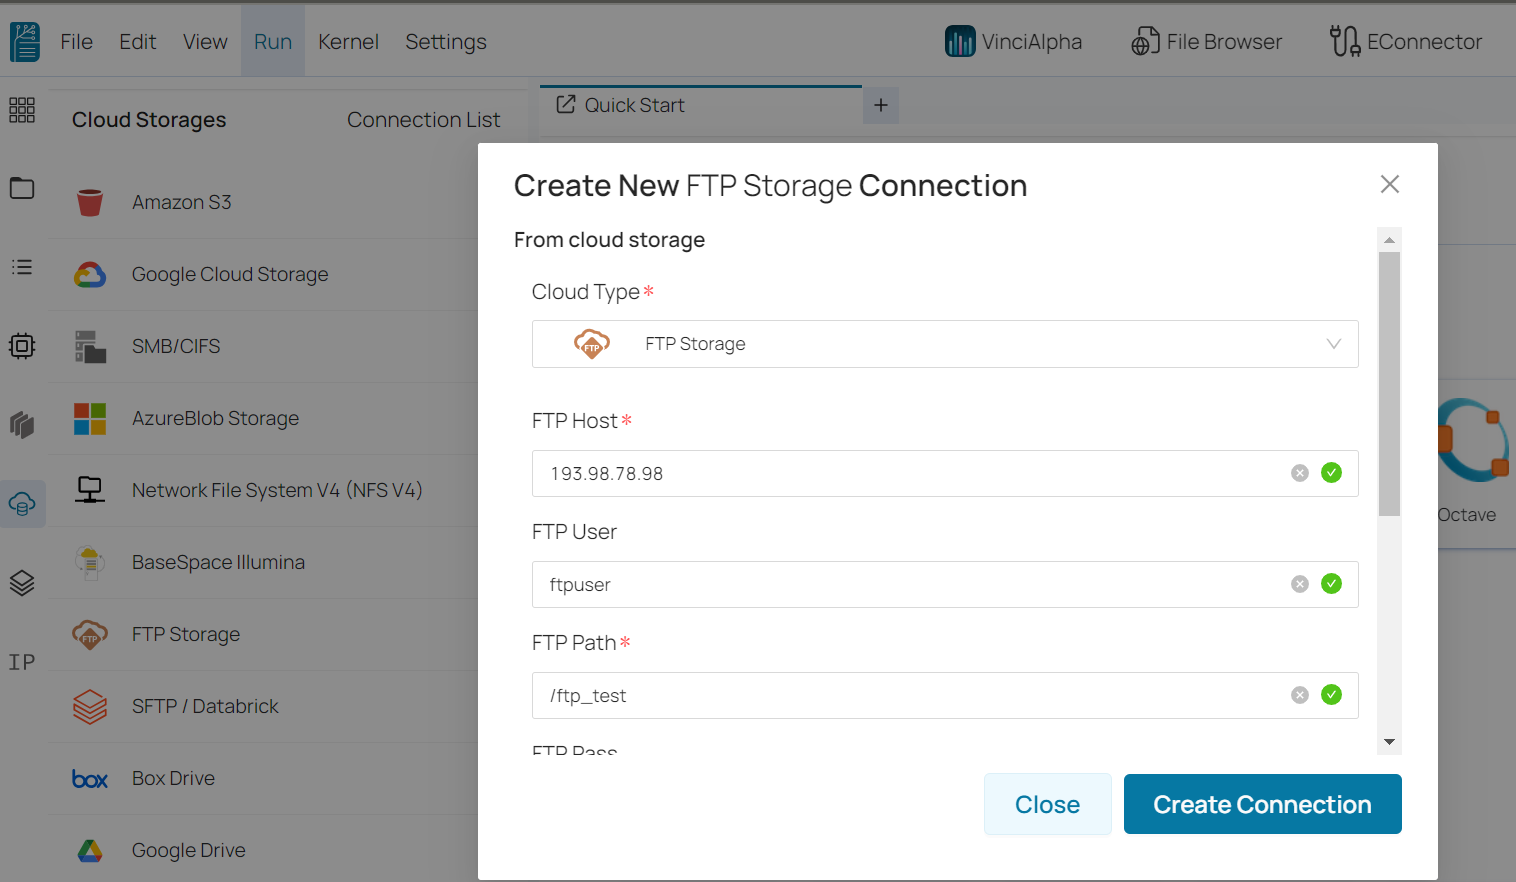
FTP Storage 
🔹 Select FTP Storage from connection list.
🔹 Provide all the mandatory information and fill to specified field.
🔹 Click on Create Connection.
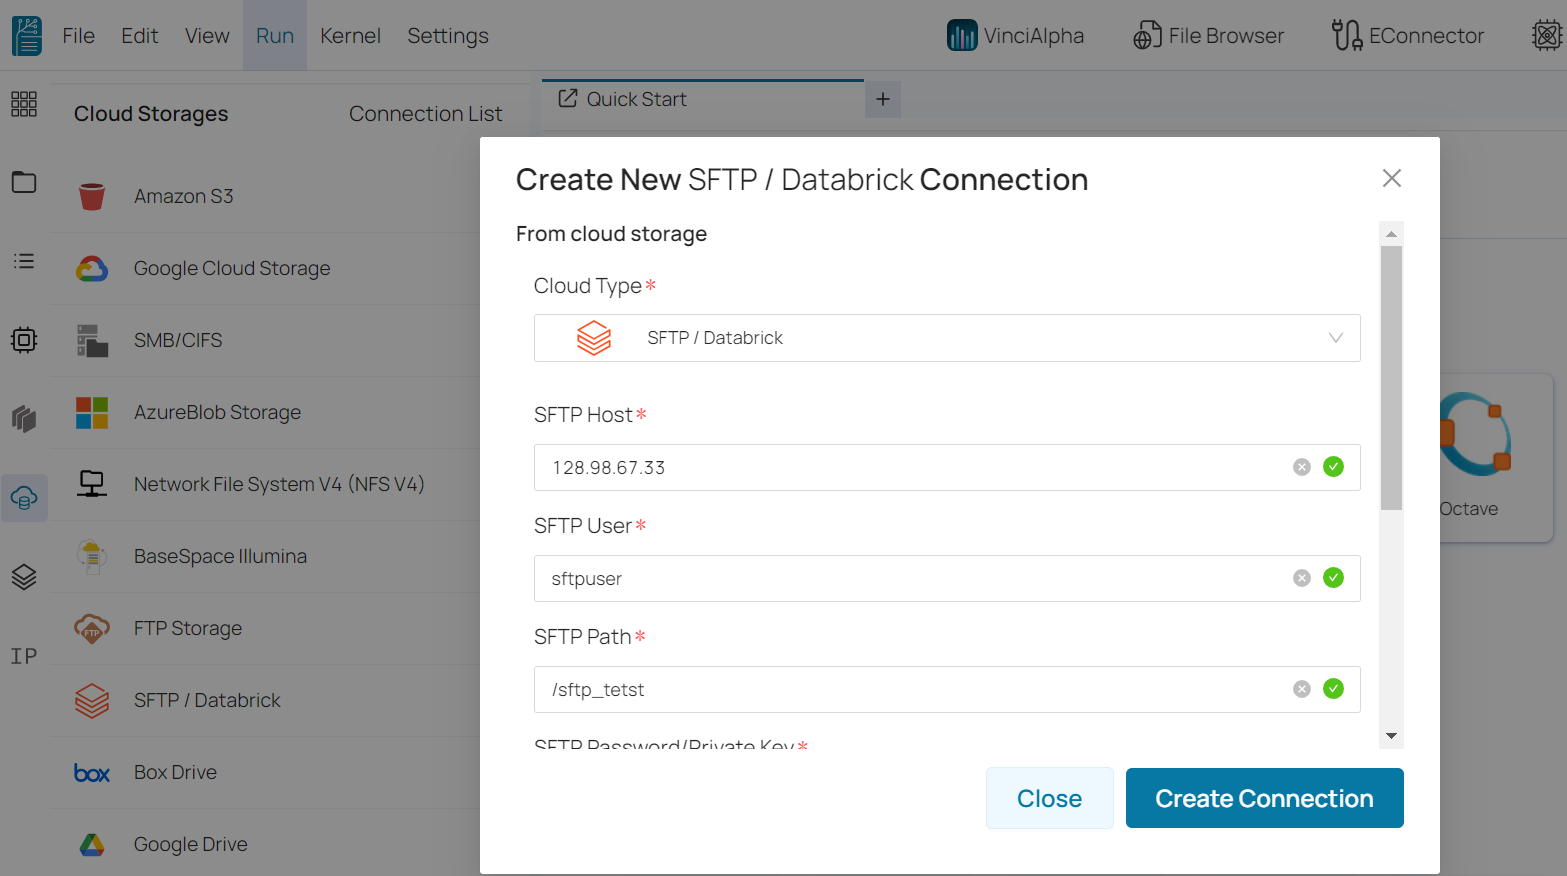
SFTP / Databrick 
🔹 Select SFTP from connection list.
🔹 Provide all the mandatory information and fill to specified field.
🔹 Click on Create Connection.
Box Drive 
🔹 Select Box Drive from connection list.
🔹 Provide all the mandatory information and fill to specified field.
🔹 Click on Create Connection.

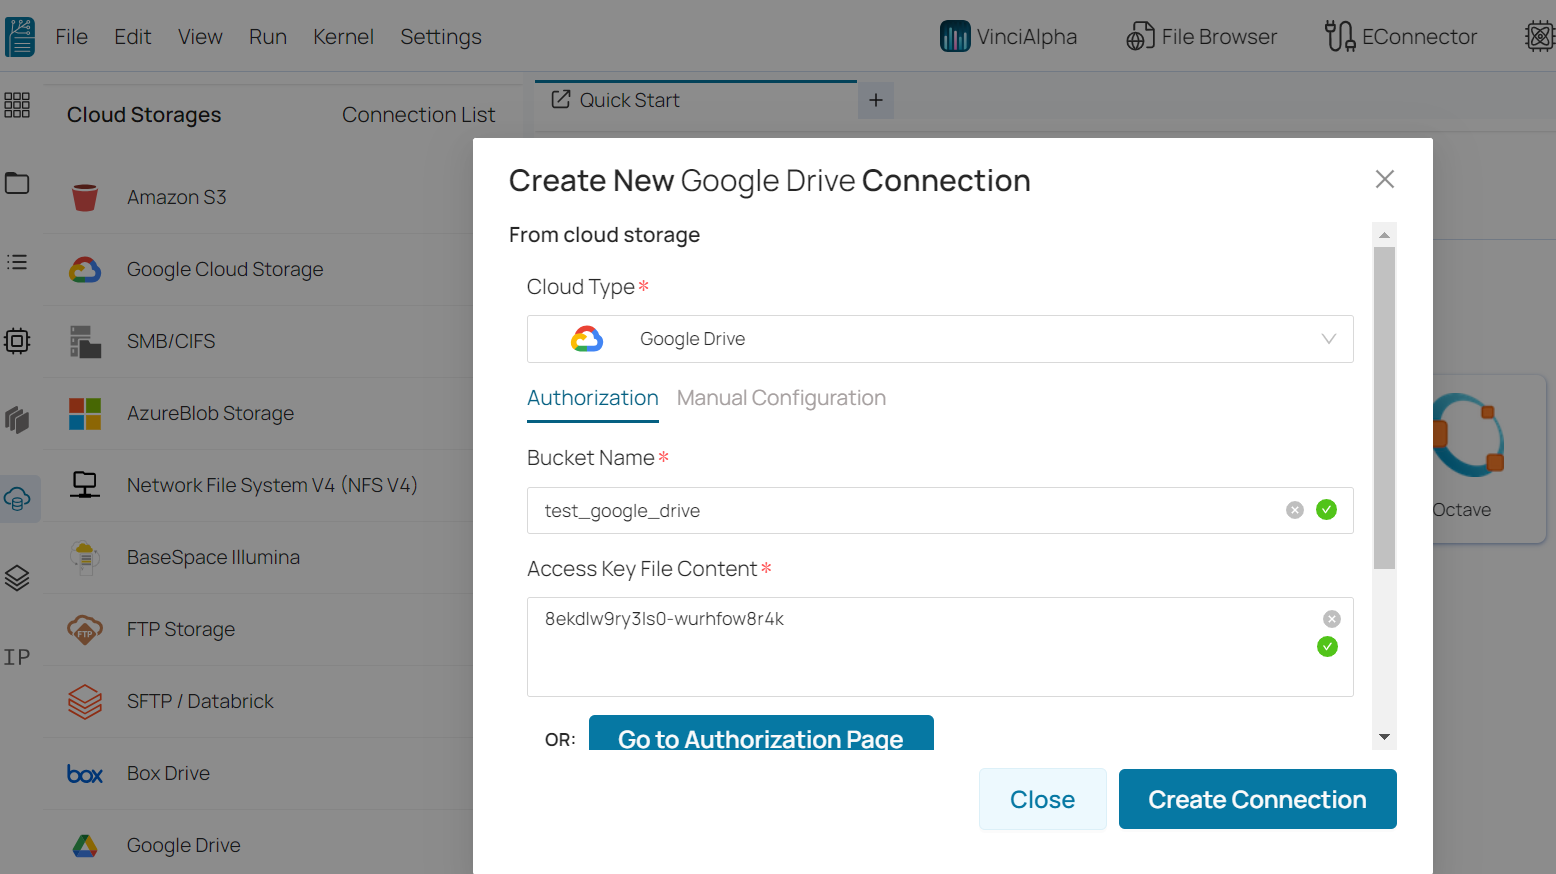
Google Drive 
🔹 Select Google Drive from connection list.
🔹 Provide all the mandatory information and fill to specified field.
🔹 Click on Create Connection.
Cloud storage - mount point and access 
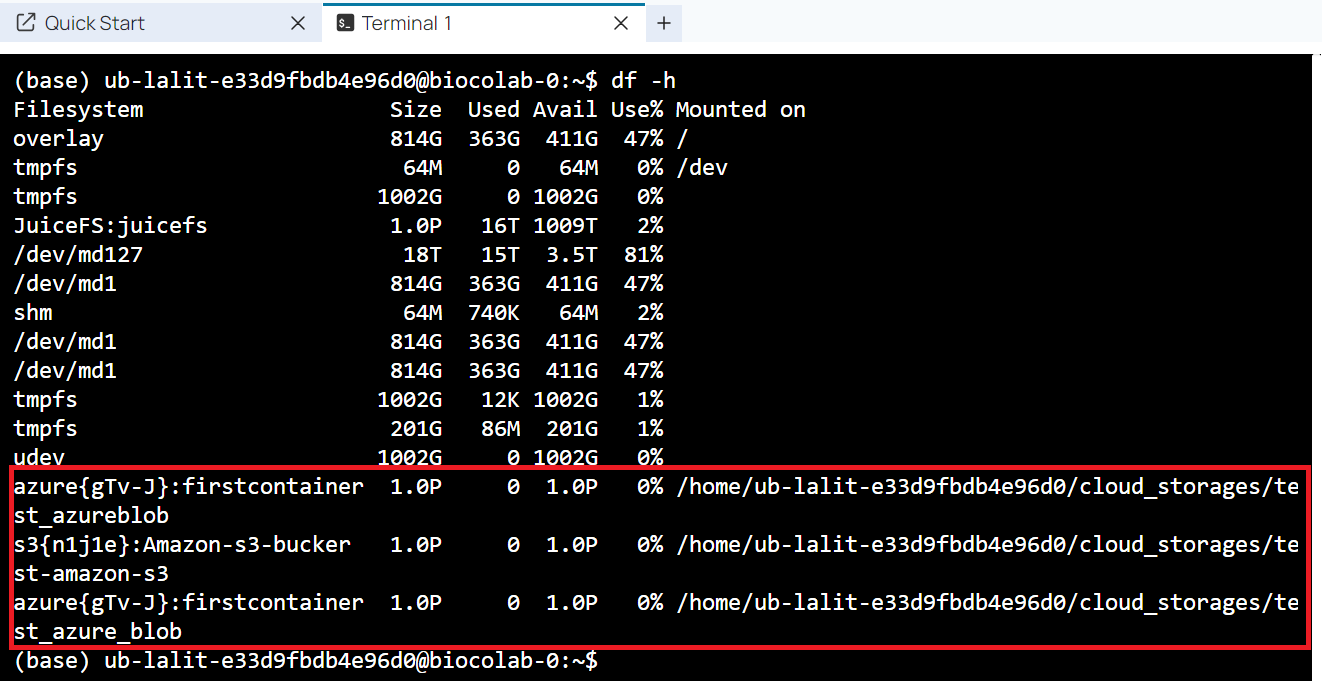
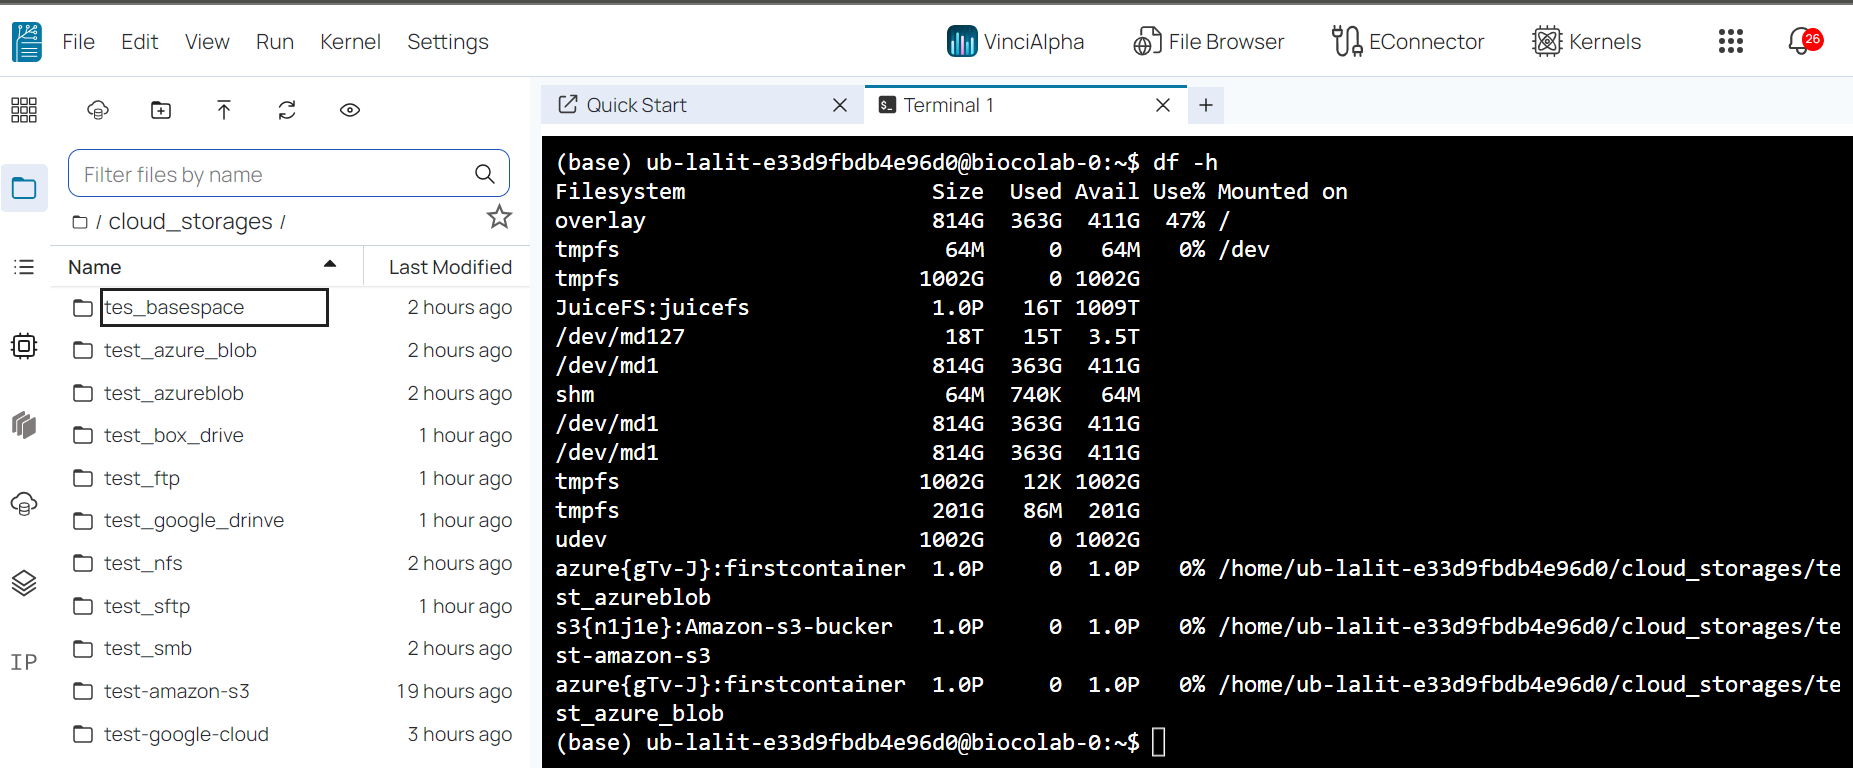
Once finished connection with cloud storage. We can view mount point on Terminal and mounted folder structure on file browser.
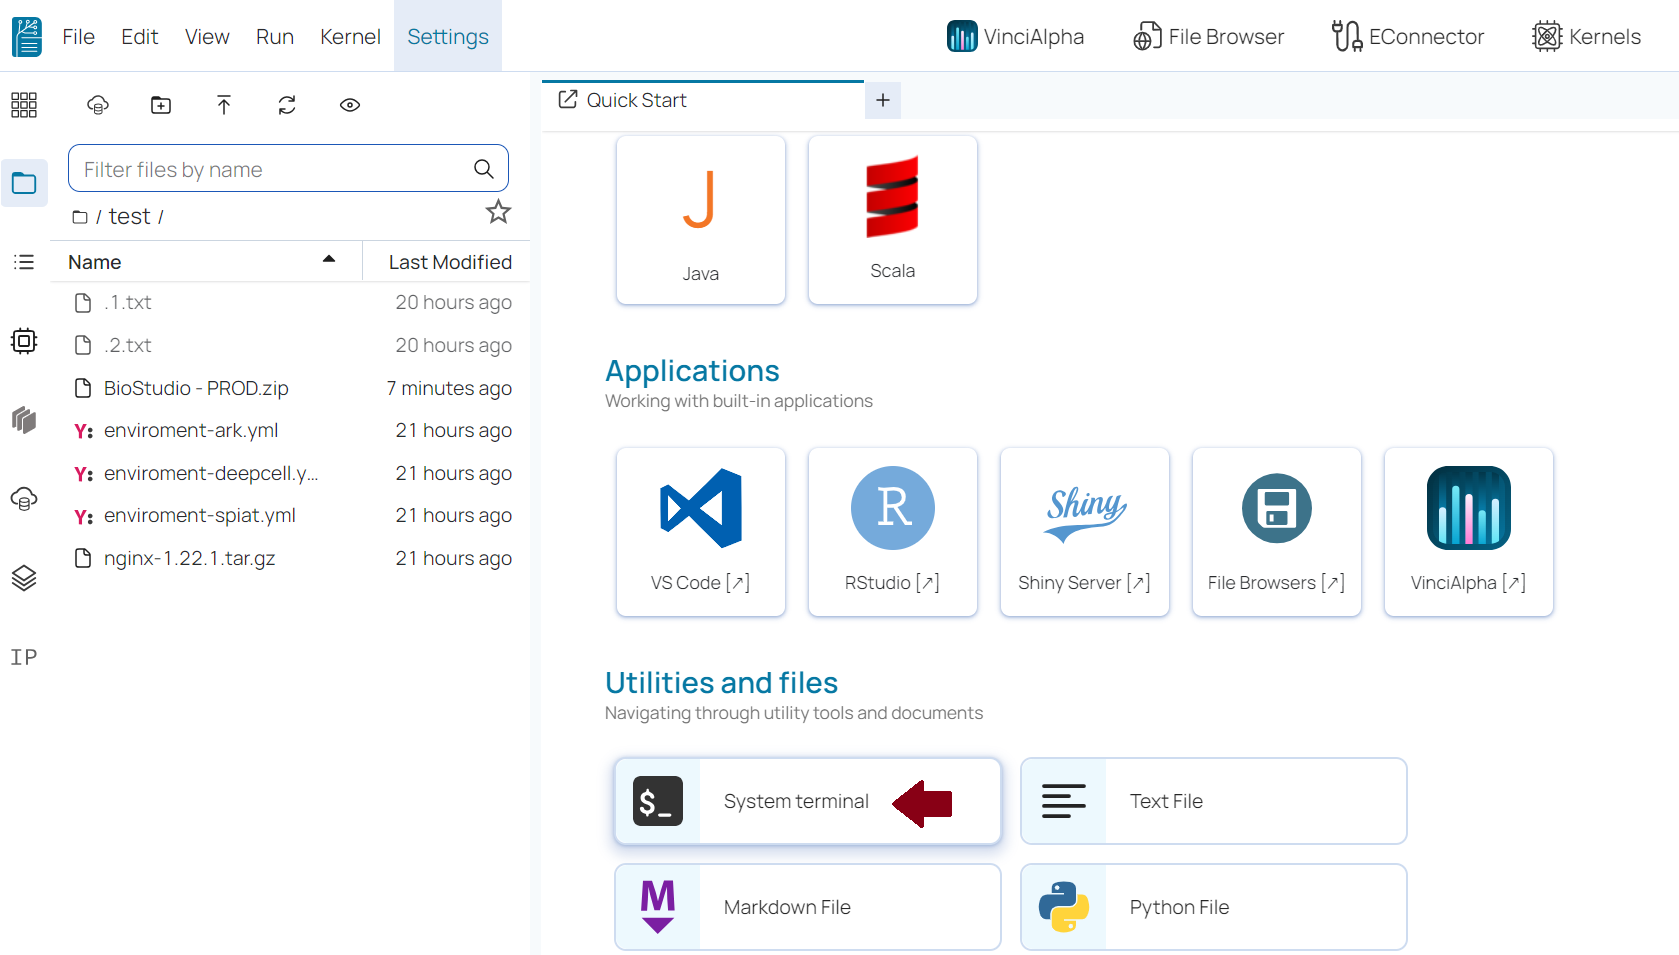
🔹 Click on System Terminal.
🔹 df -h command will show you available mount point.
🔹 We can click on File Browser and can switch inside cloud_storages folder to see all available mount point and there structure.
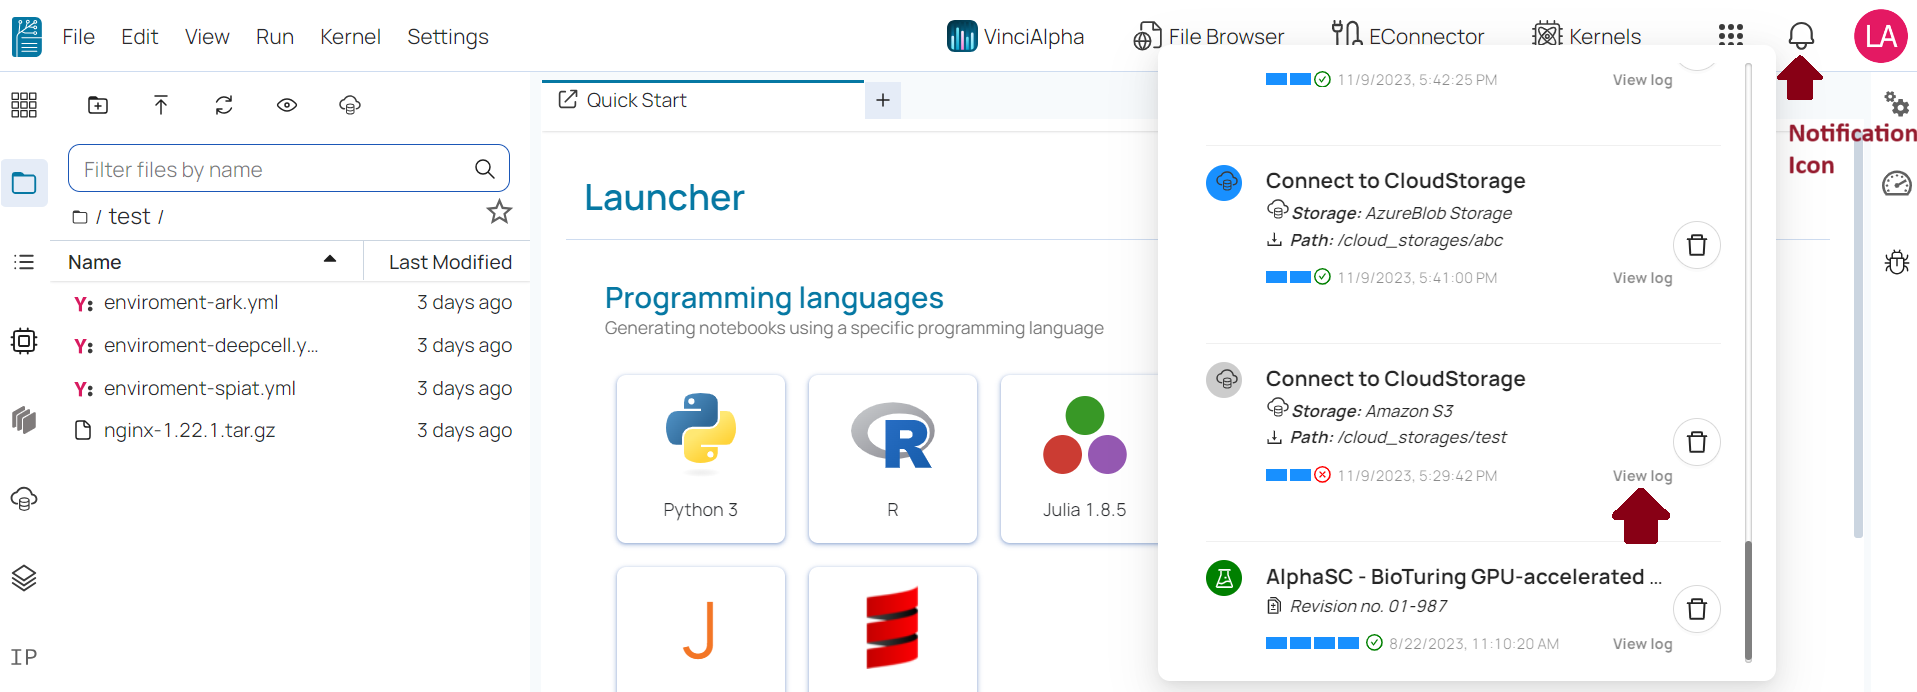
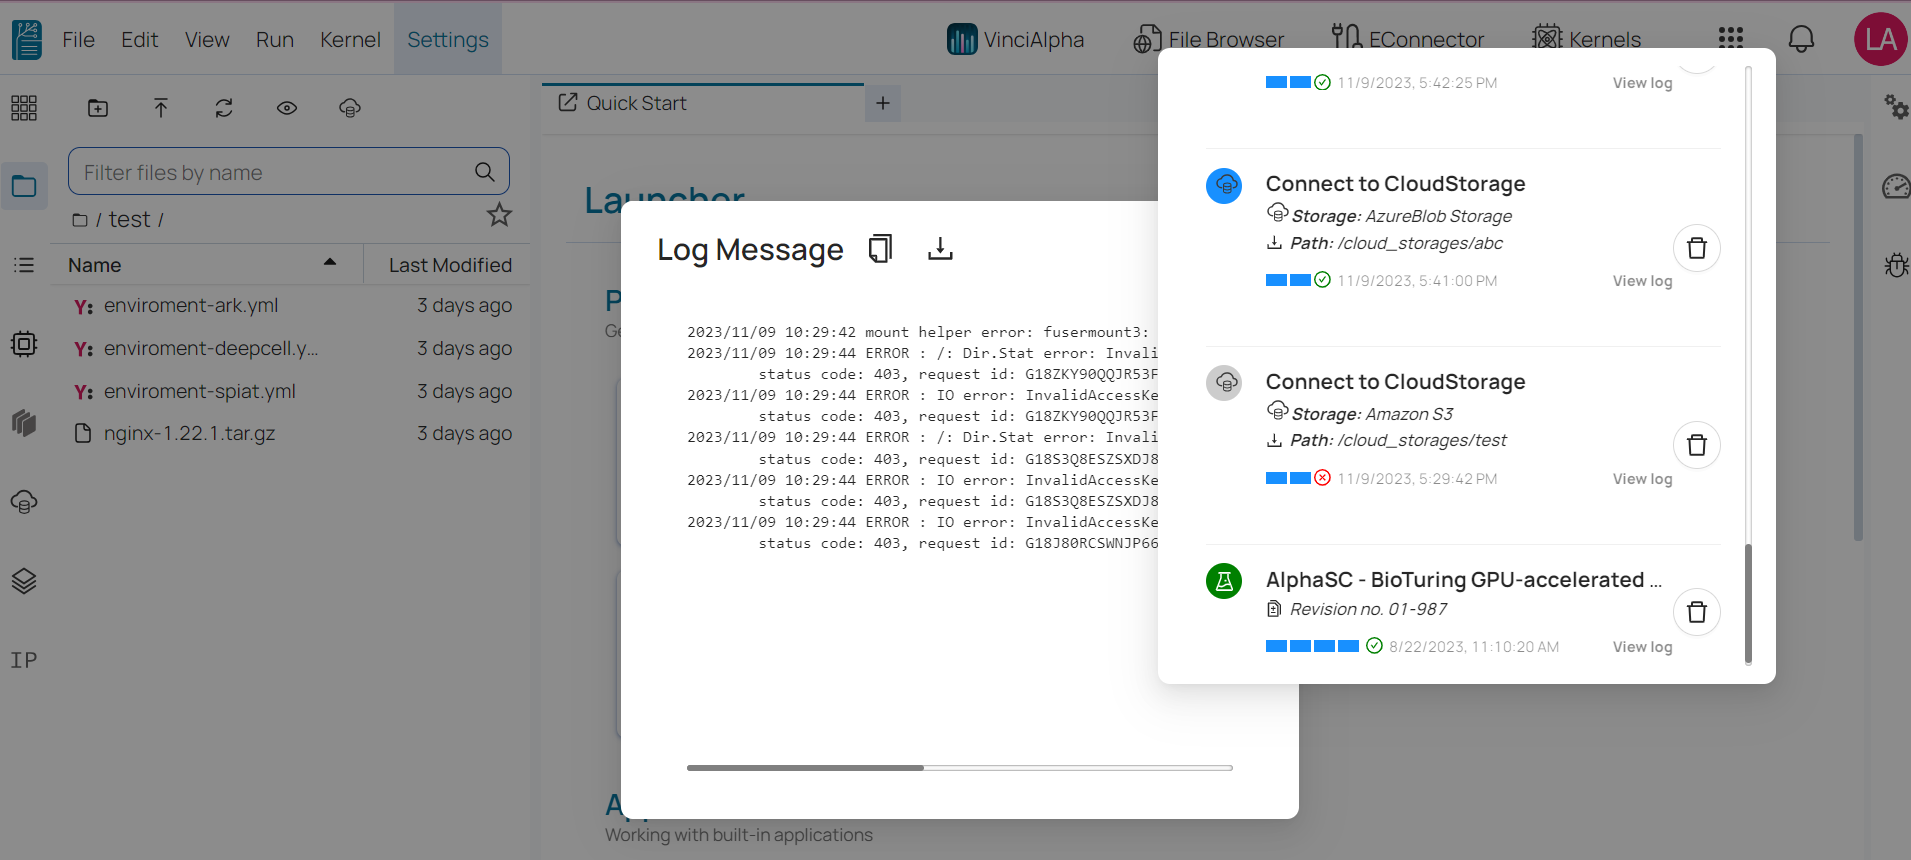
🔔 Note: We can view failure connection lof using following way.
🔹 Click on Notification Icon.
🔹 Click on View log.
🔹 You can view log message for more details.
File Browser - Menu Bar 
This is an another way to upload / Download files / folders. This is a BioStudio application that helps us to fast upload.
🔹 Click on File Browser.

🔹 File Browser will open in new tab.
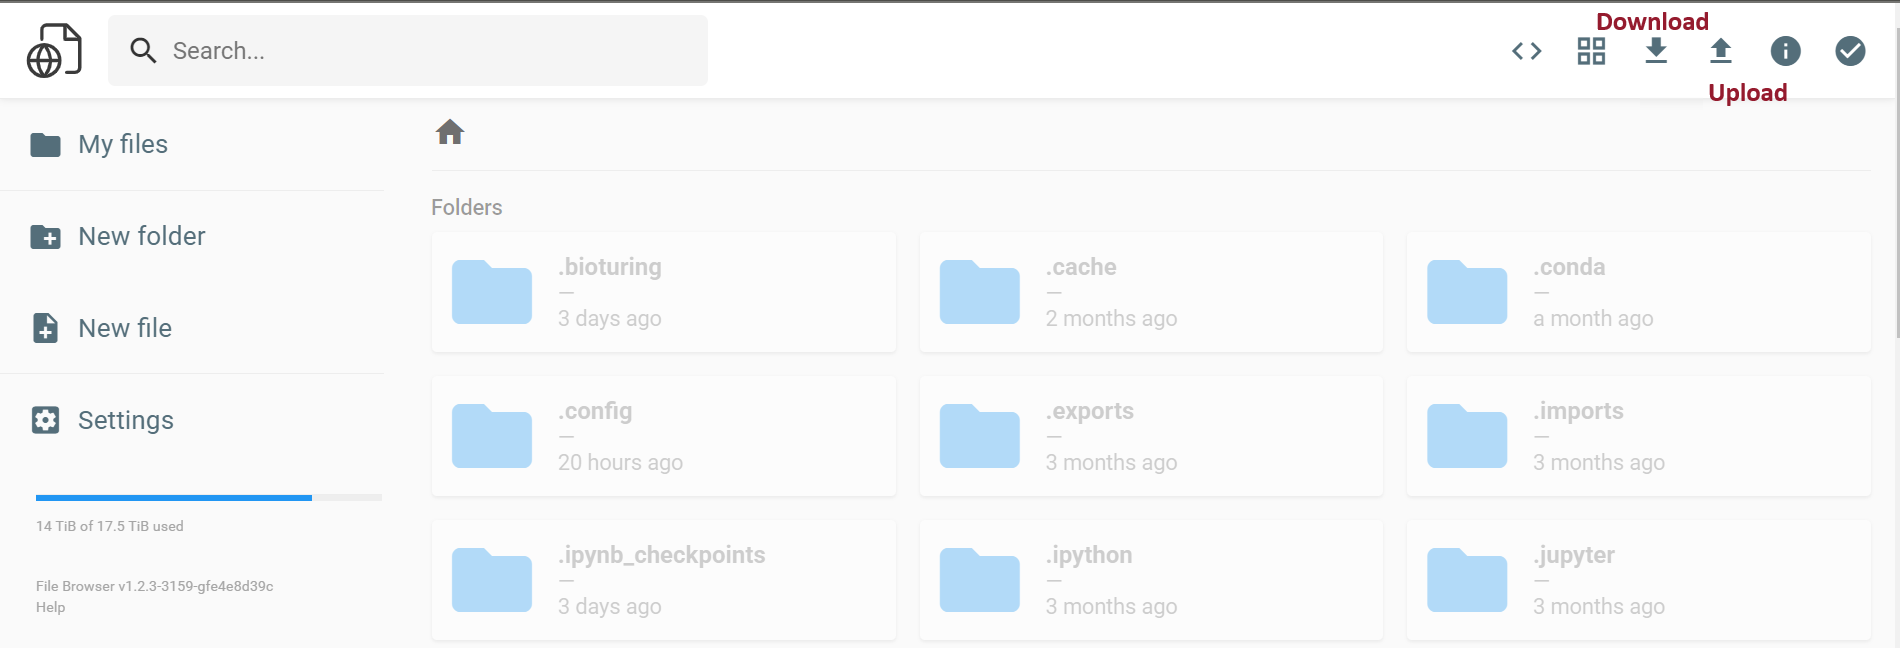
💠 Download
🔹 Click on Download icon.
🔹 It will allow us to select compress option for specific folder ans download. If we will select a specific file then, It will download to our local.
Folder:
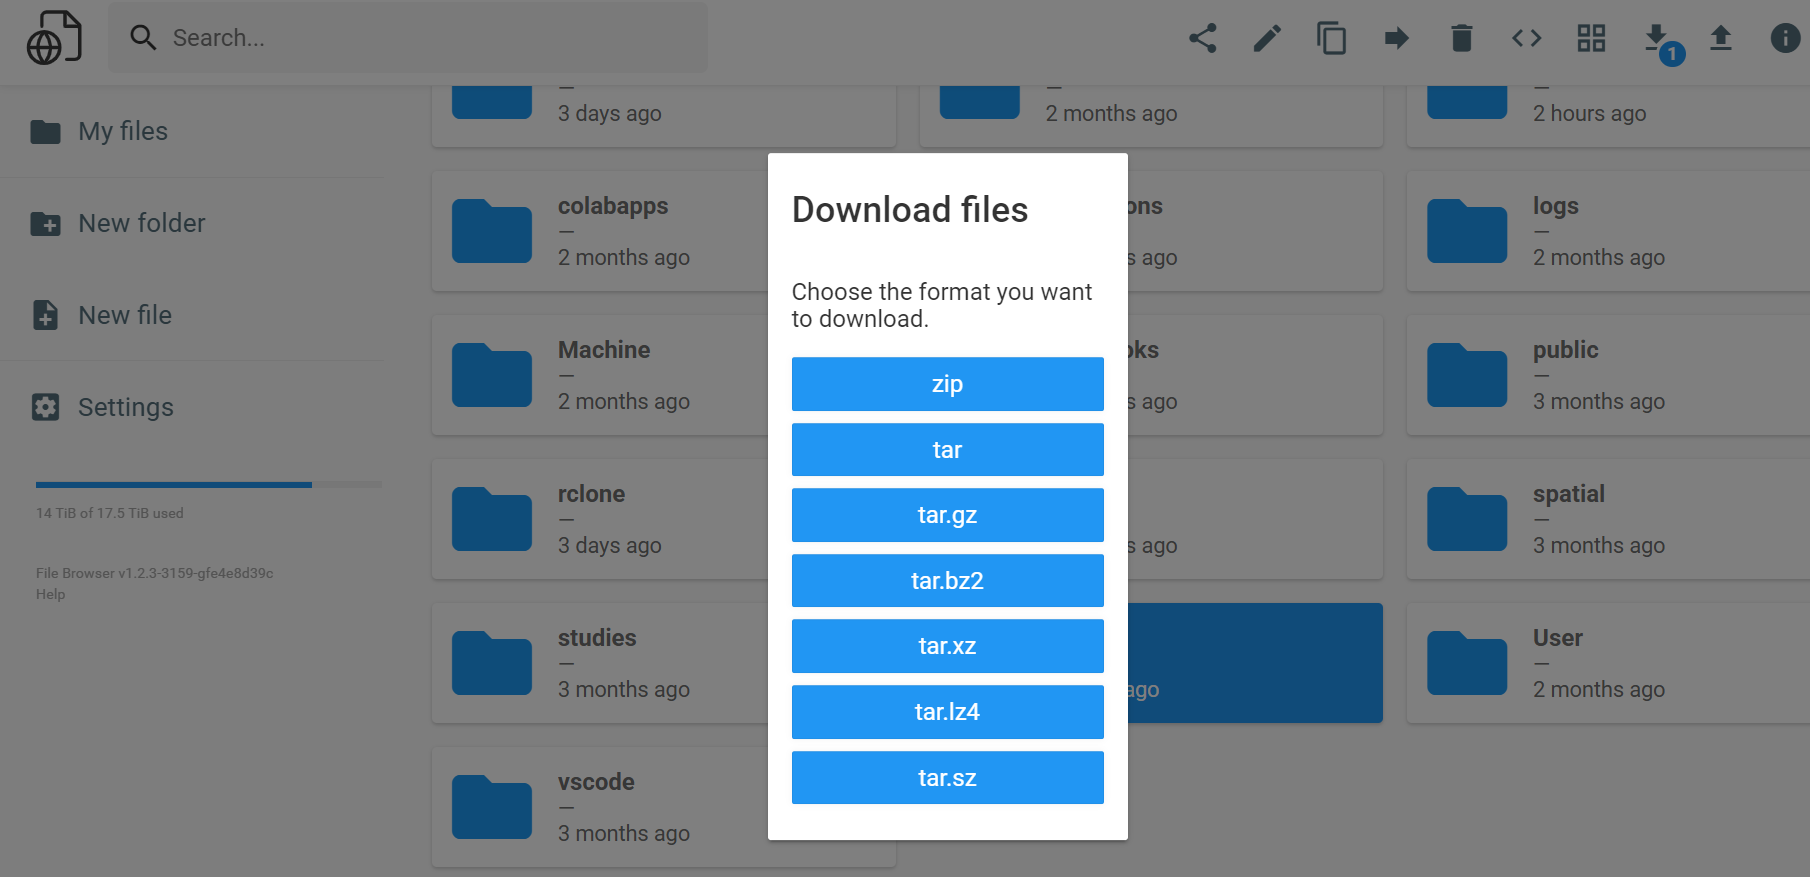
File:
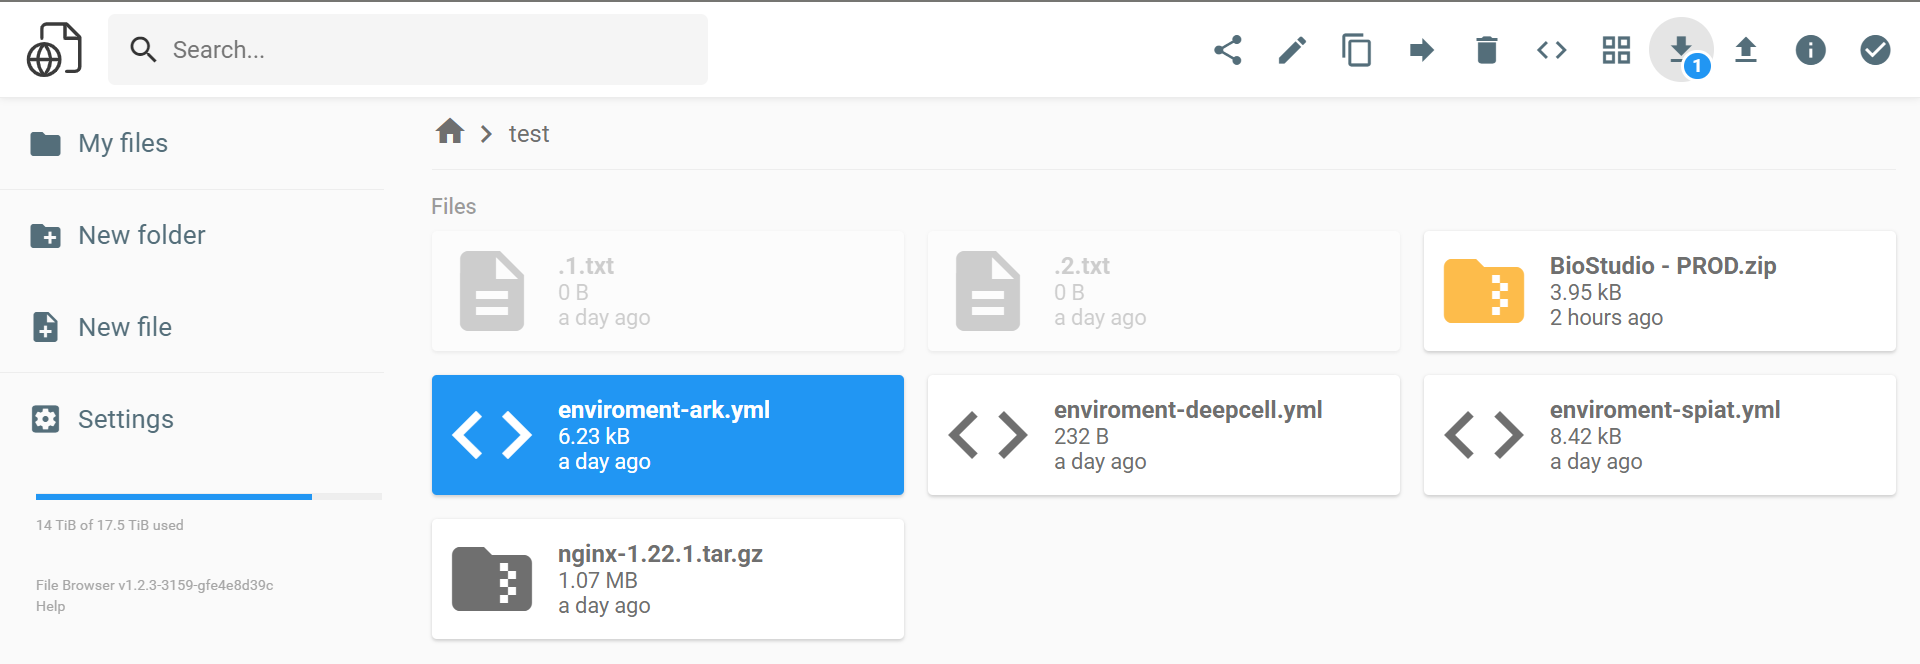
💠 Upload
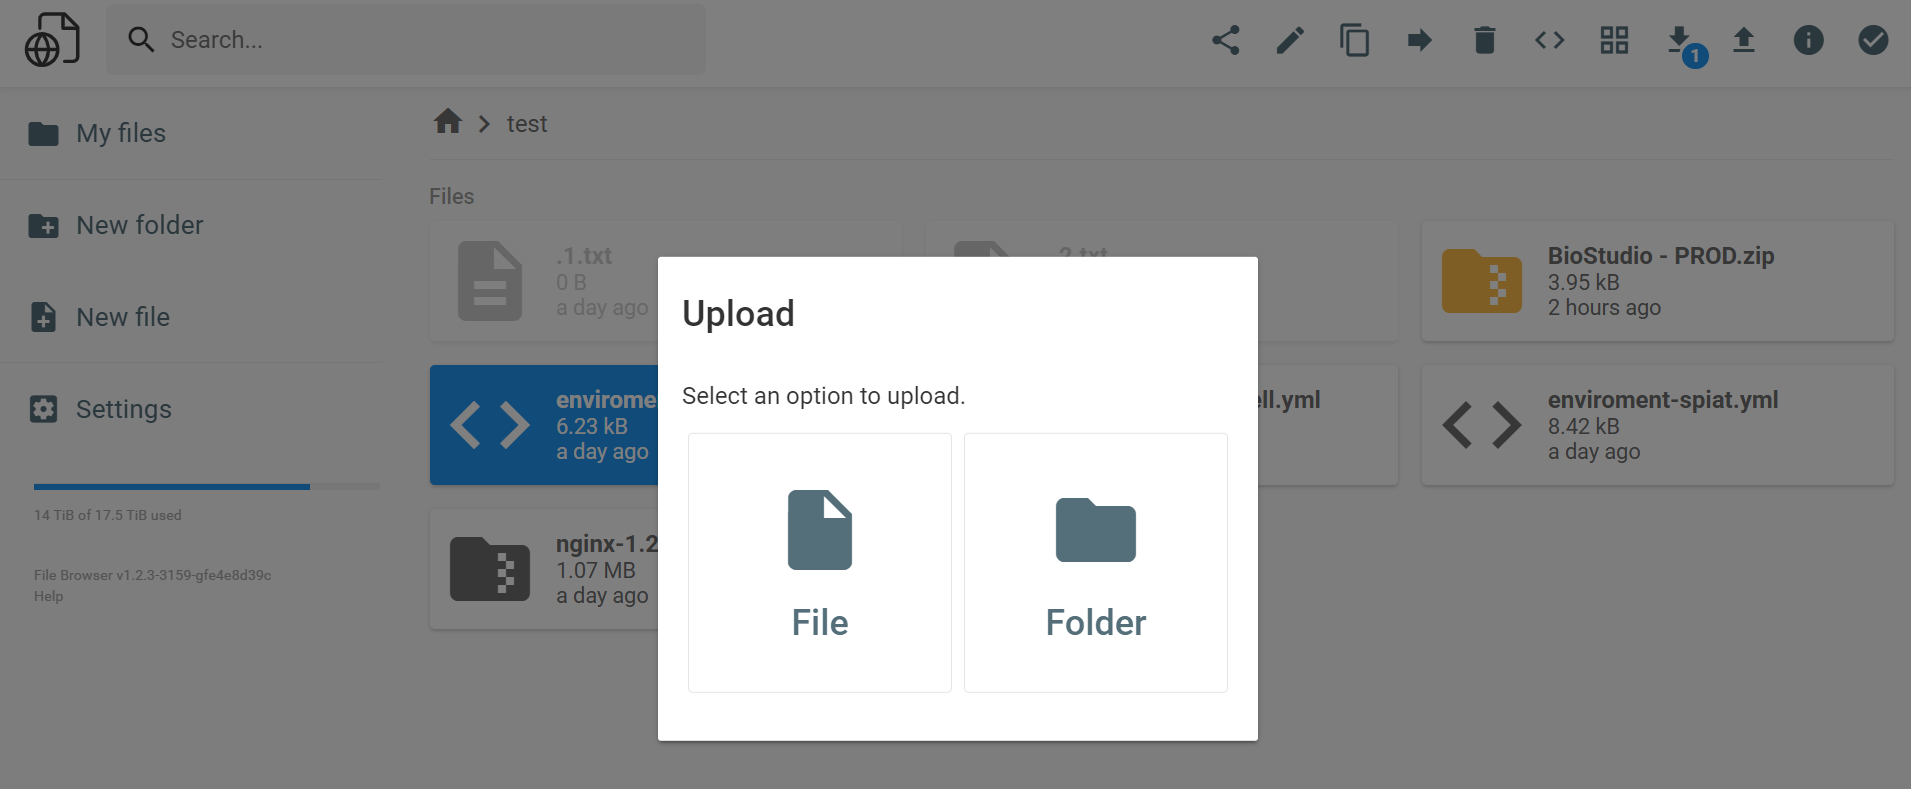
This option helps us to upload any files / folder to BioStudio.
🔹 Click on upload icon.
🔹 Option to select file / folder will display.
🔹 Select file / folder based on your requirement.
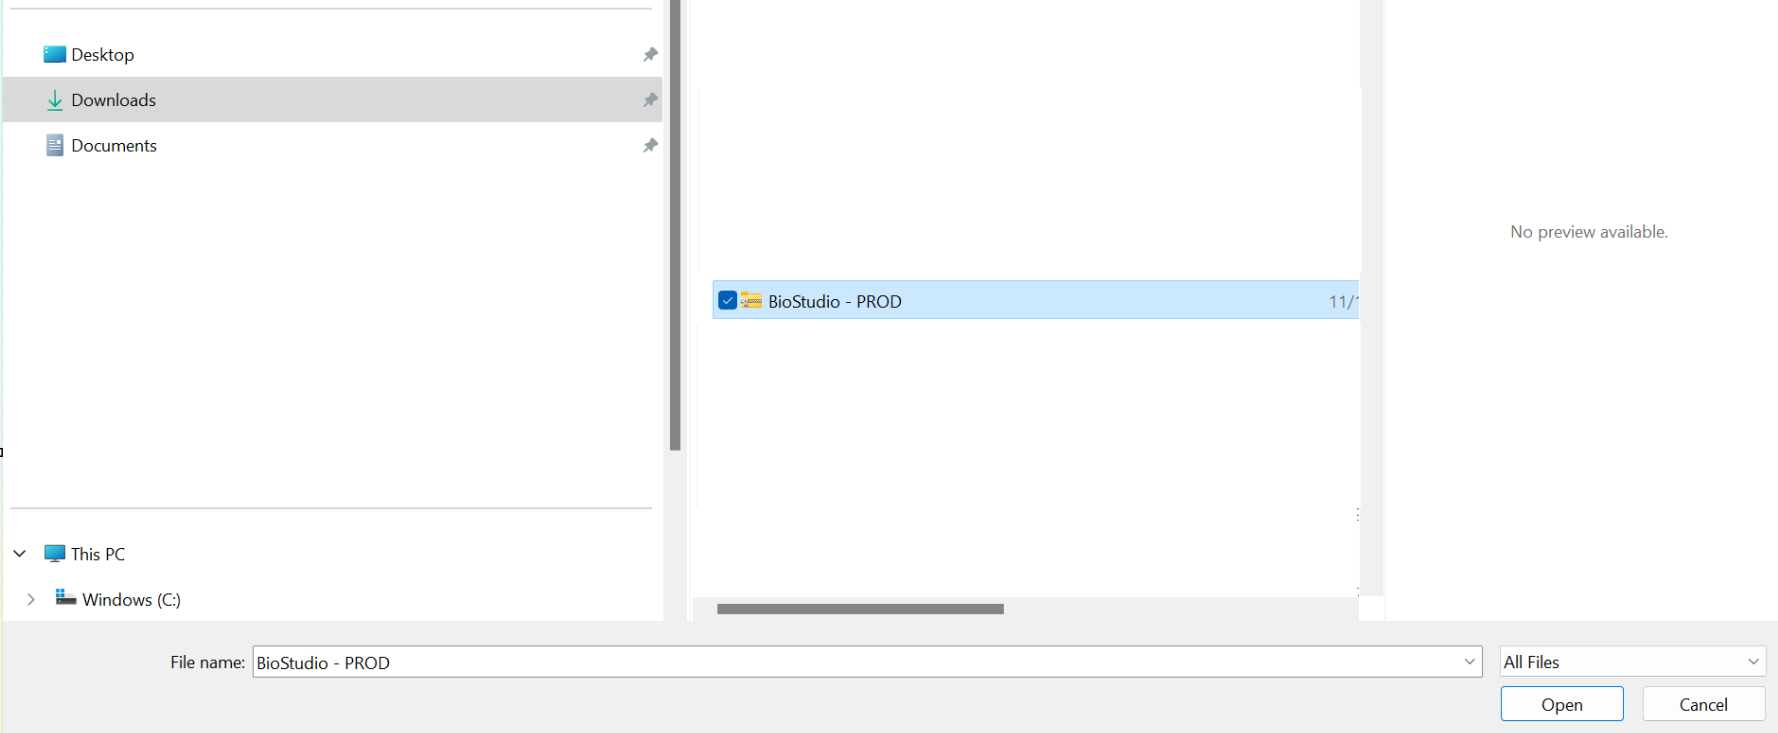
🔹 Select file / folder and click on open.
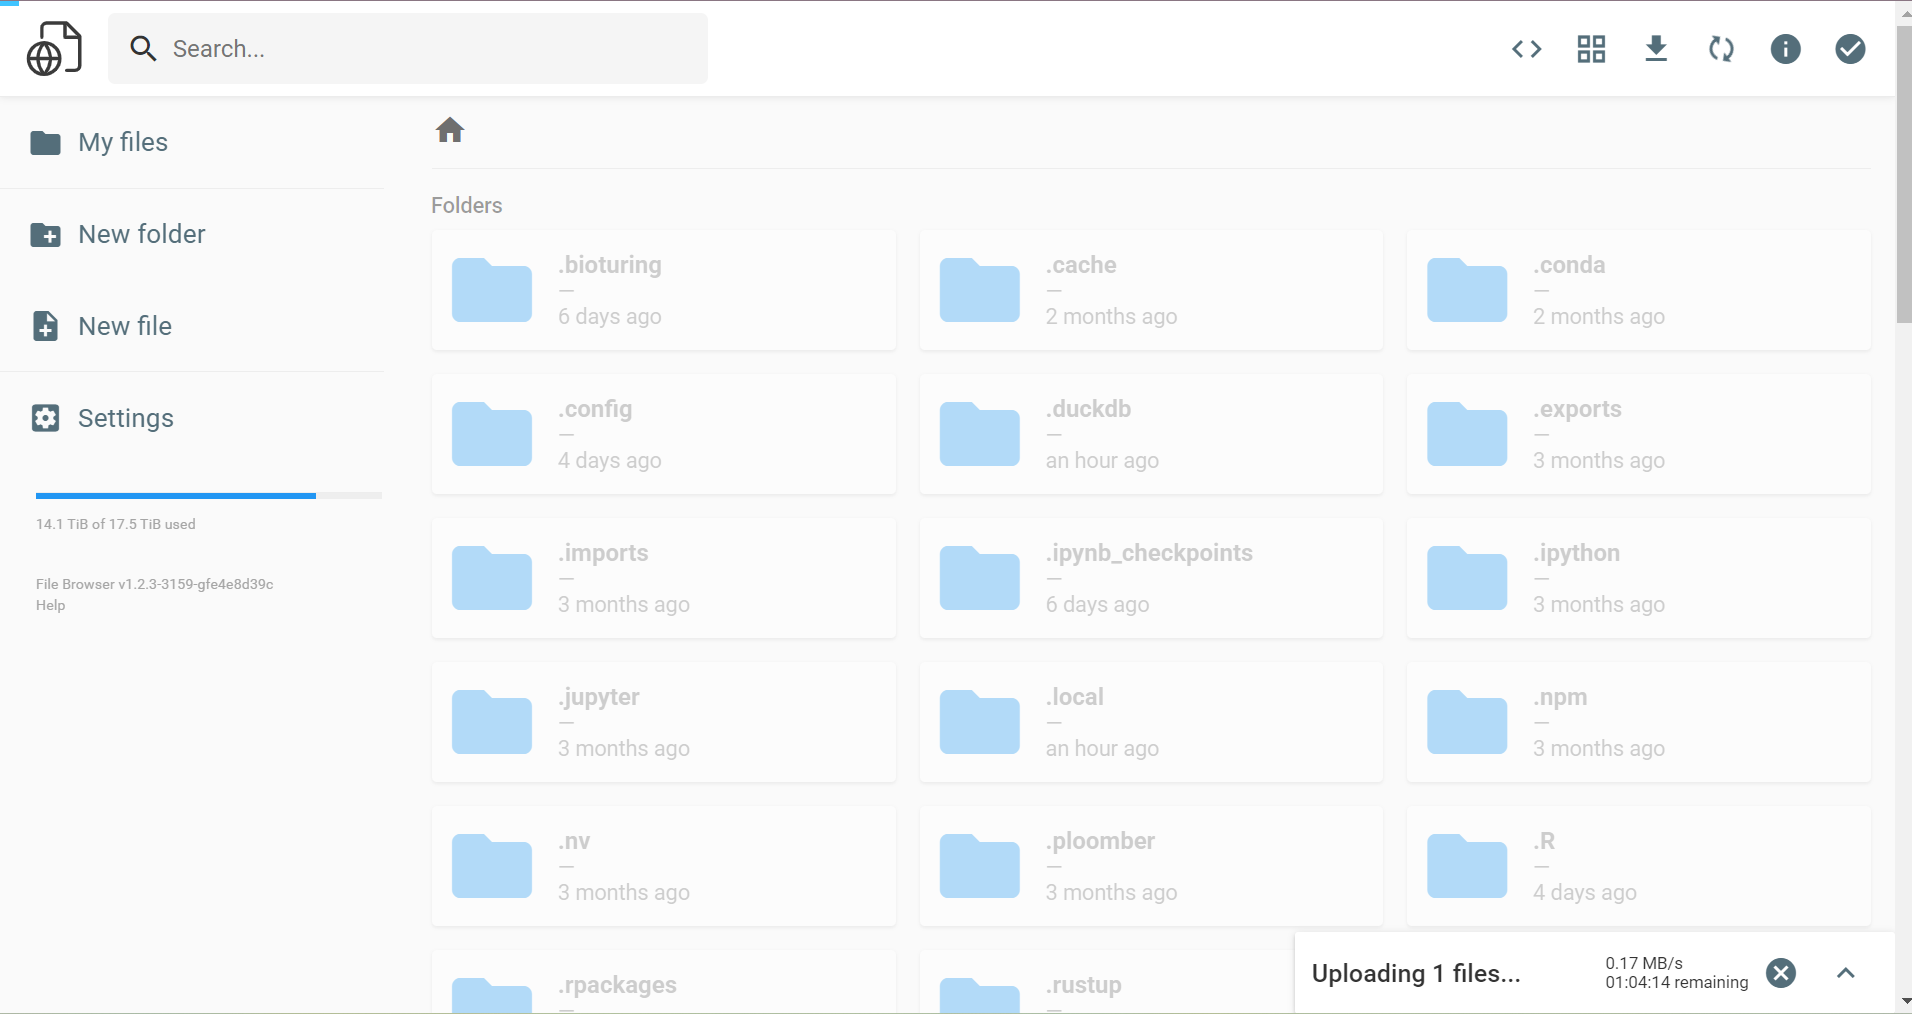
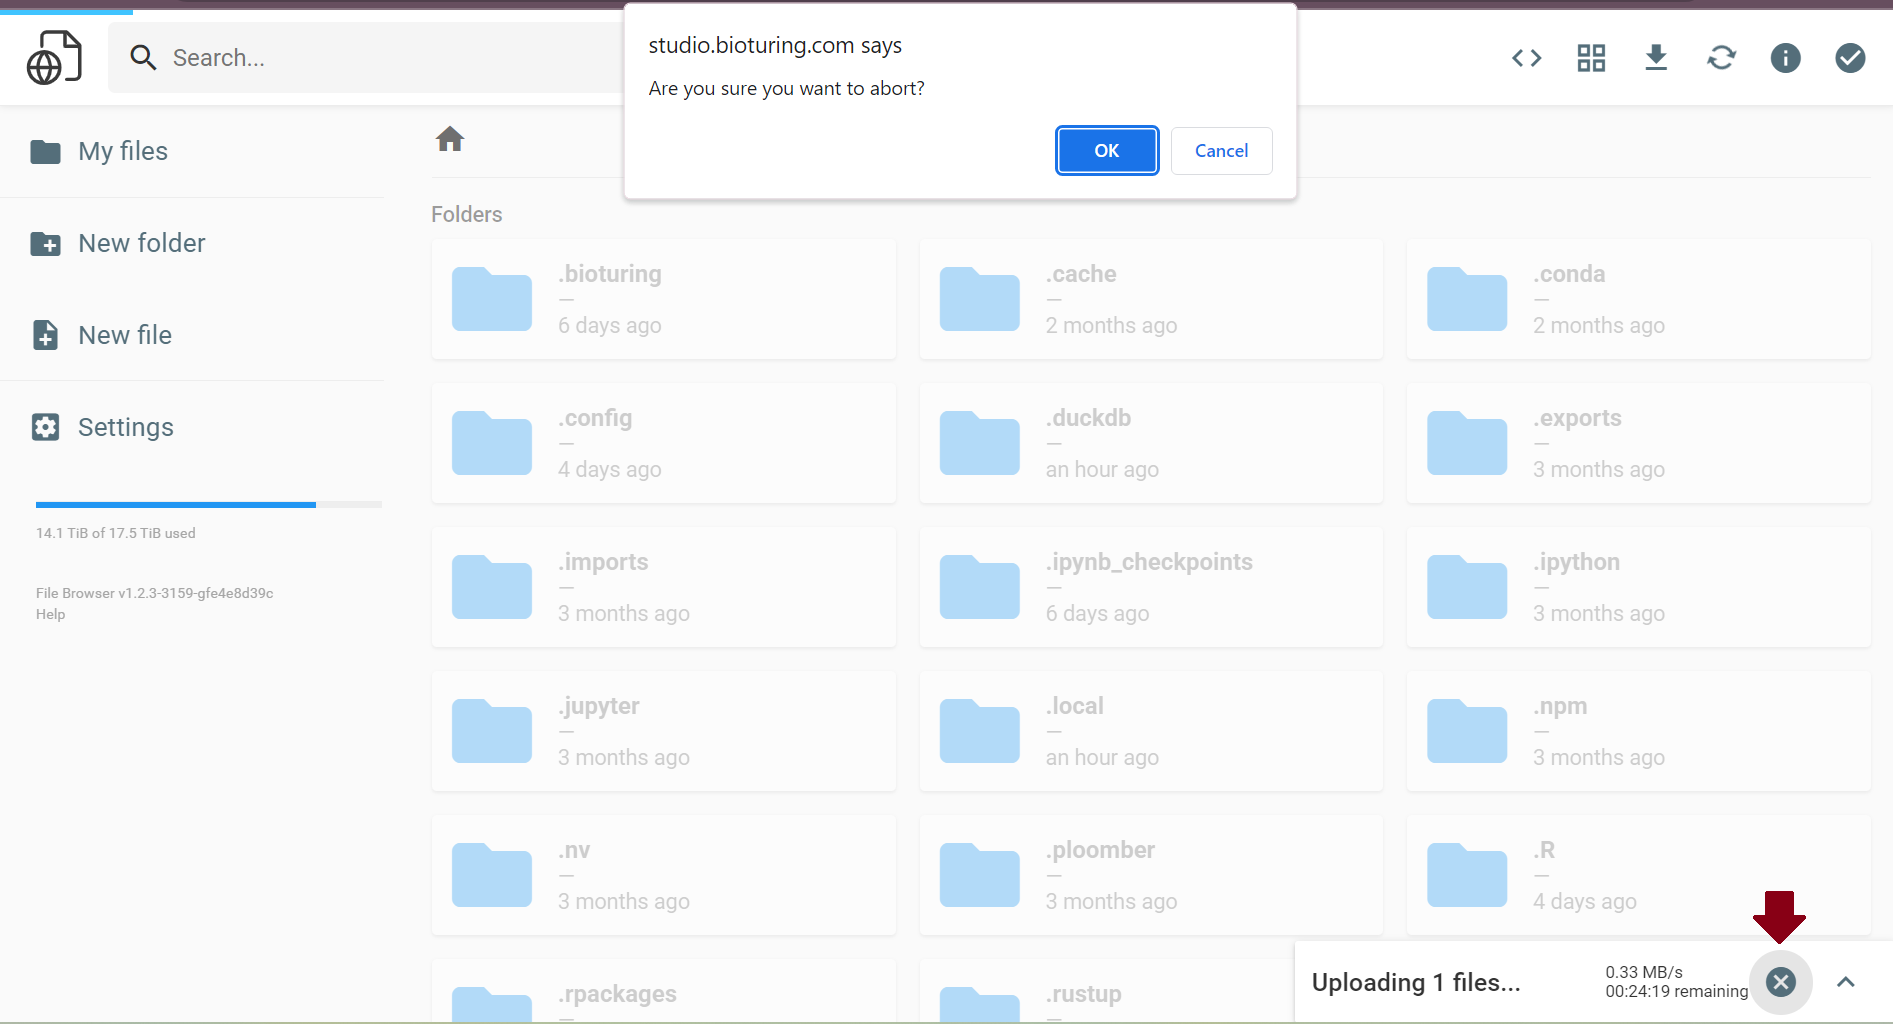
🔹 You can view upload status at the bottom.
🔹 File has been uploaded successfully.
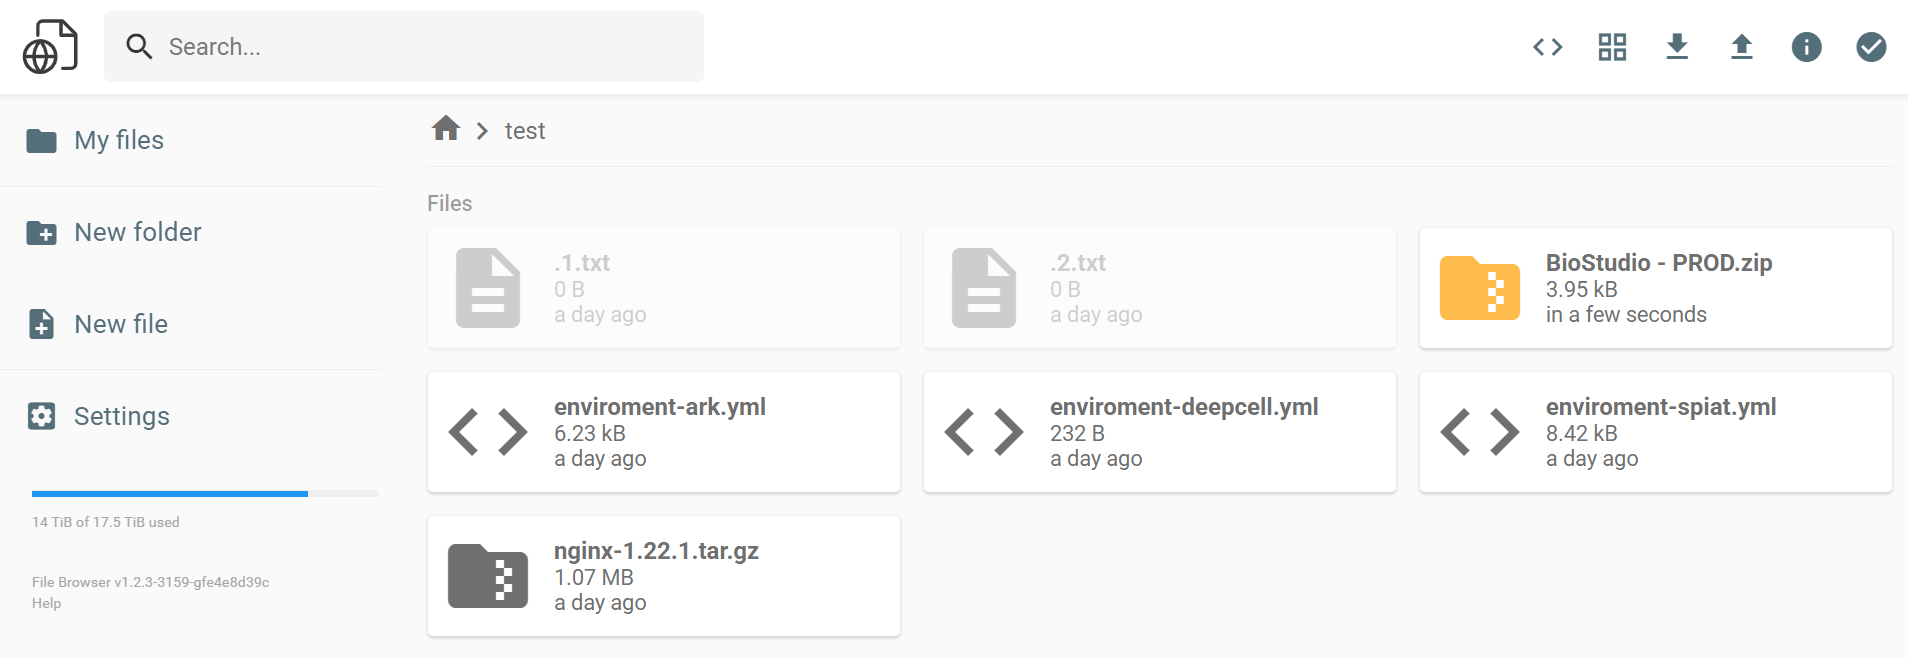
🔹 We can click on the cross button for uploading file status to stop this upload.
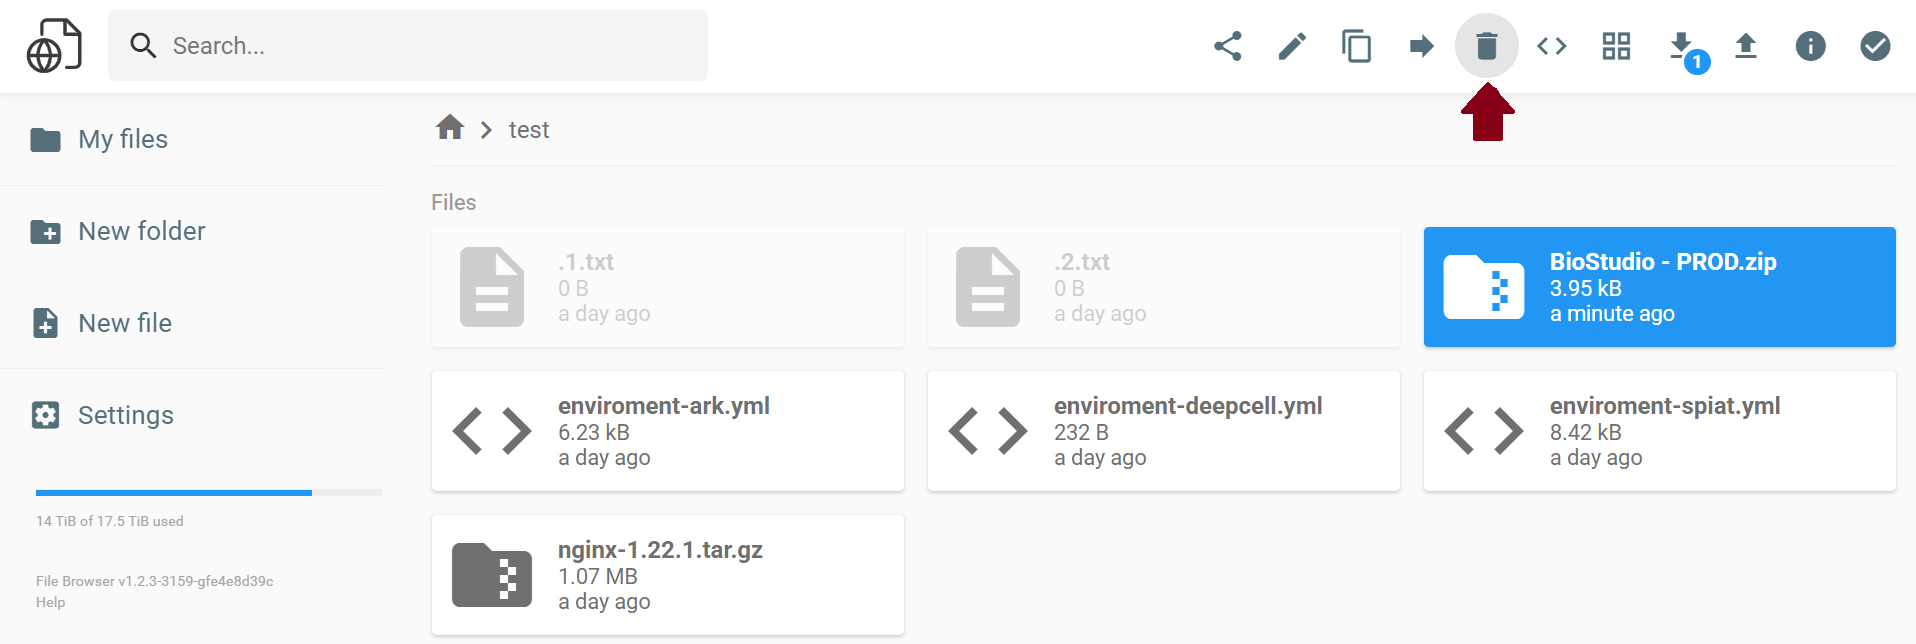
🔹 We can delete file from file browser using delete button.
